A broken dryer can disrupt your daily routine and make laundry day a real hassle. When your dryer is not heating properly, it leaves you with damp clothes and growing frustration. This issue is particularly common in older machines that have seen years of regular use.
While it might seem like a major problem, there are often straightforward solutions that can get your dryer working properly again. Understanding the basic causes can help you fix the issue and get back to having warm, dry clothes.
Why My Dryer Is Not Getting Hot
If your dryer stops heating, it can be a major hassle to you if it is something you usually use to fold and dry your clothes. Ultimately, instead of the warm and fluffy clothes you anticipated, you get a cold, wet mess.
But this guide will help you understand why your dryer may be broken. Knowing why your dryer isn’t heating may help you fix it yourself or understand what’s going on before you call a repair service, so here’s everything you need to know about that.
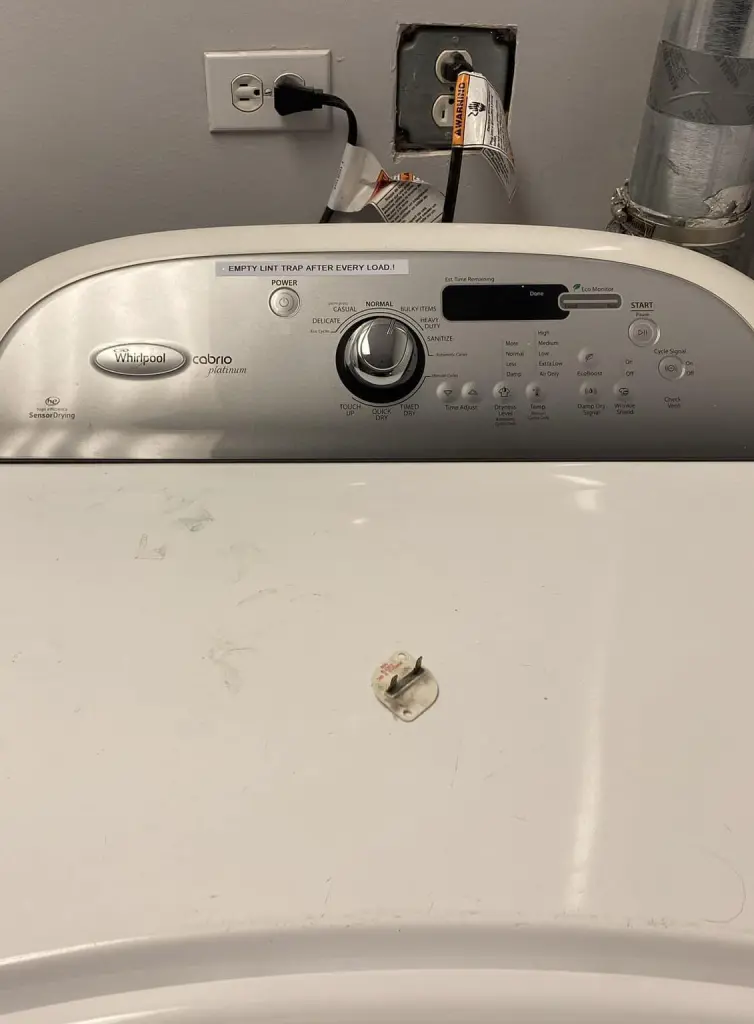
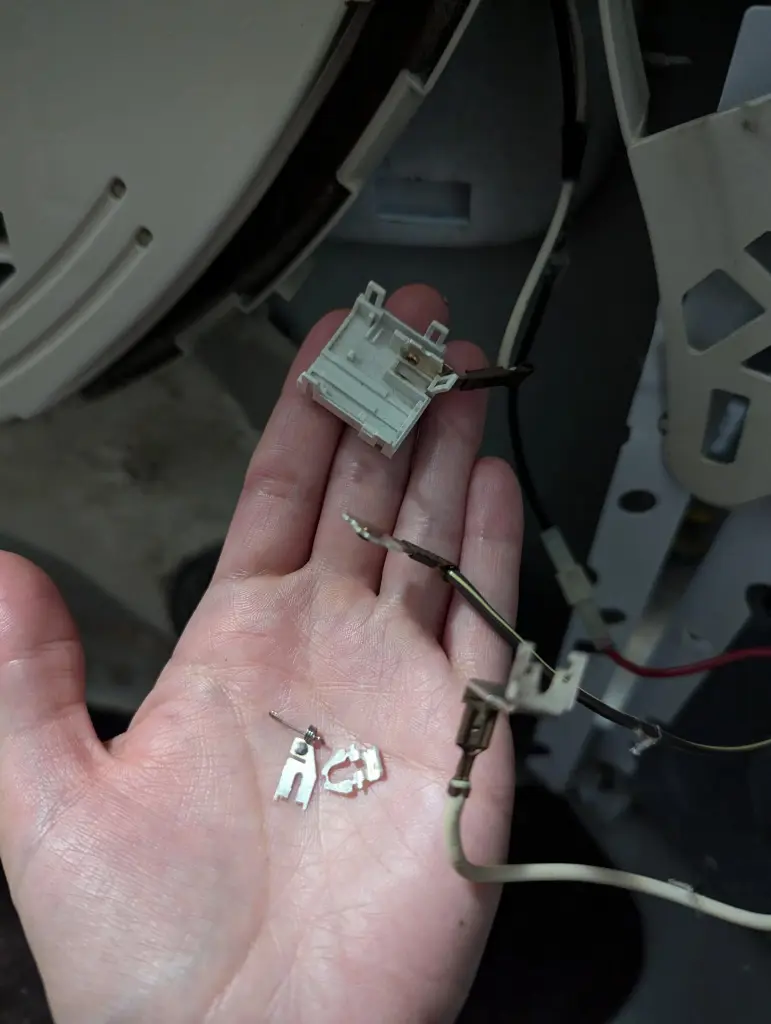
The thermal fuse is your dryer's primary safety guardian, typically located near the back of the machine. Once that fuse blows, there’s no fixing it; it's just replacement.
The important thing to know is that a blown thermal fuse is very often the result of a bigger problem. This commonly happens when your dryer’s ventilation system is obstructed and the hot air has to backtrack into the machine.
Running your dryer for extremely long periods with heavy loads can also trigger this safety device.
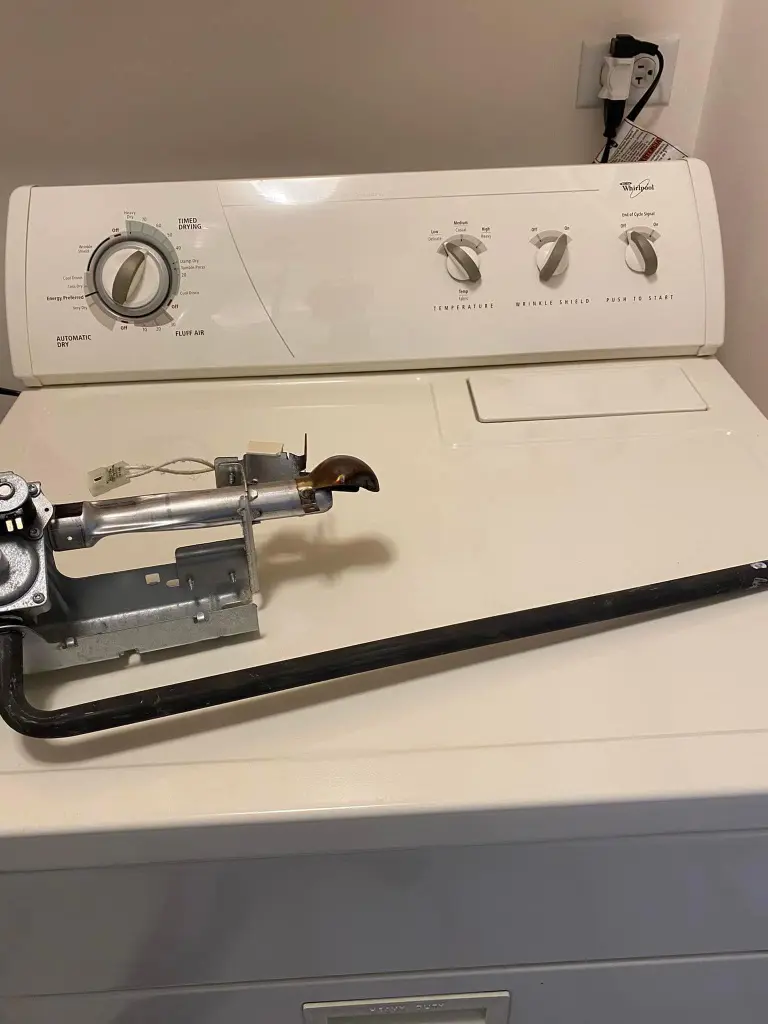
When functioning correctly, this element glows bright orange and generates all the heat needed to dry your clothes effectively. Over time, these elements can fail in several ways. Sometimes they simply burn out completely, like a light bulb reaching the end of its life.
Other times, they might develop breaks or cracks in the coil, or show burnt spots indicating they're on their way to failing. When examining a heating element, you can often spot visible damage, such as breaks in the coil or discolored areas.
3. Power Supply Problems
Unlike most household appliances, most dryers require 240 volts of power, divided between two circuits for a strong 110 volt system. The two 110 volt circuits work together when all is well, combining the two to create the full 240 volts your dryer needs to run optimally.
However, if either circuit fails, you might experience puzzling symptoms. Your dryer might still tumble and appear to be working, but produce no heat whatsoever.
Sometimes you'll hear all the normal operating sounds but feel no warmth, or the controls might work perfectly while nothing else happens.
A common scenario is when one circuit breaker trips while the other remains active, leaving you with a partially functioning dryer. Always check both circuit breakers in your electrical panel when troubleshooting power issues.
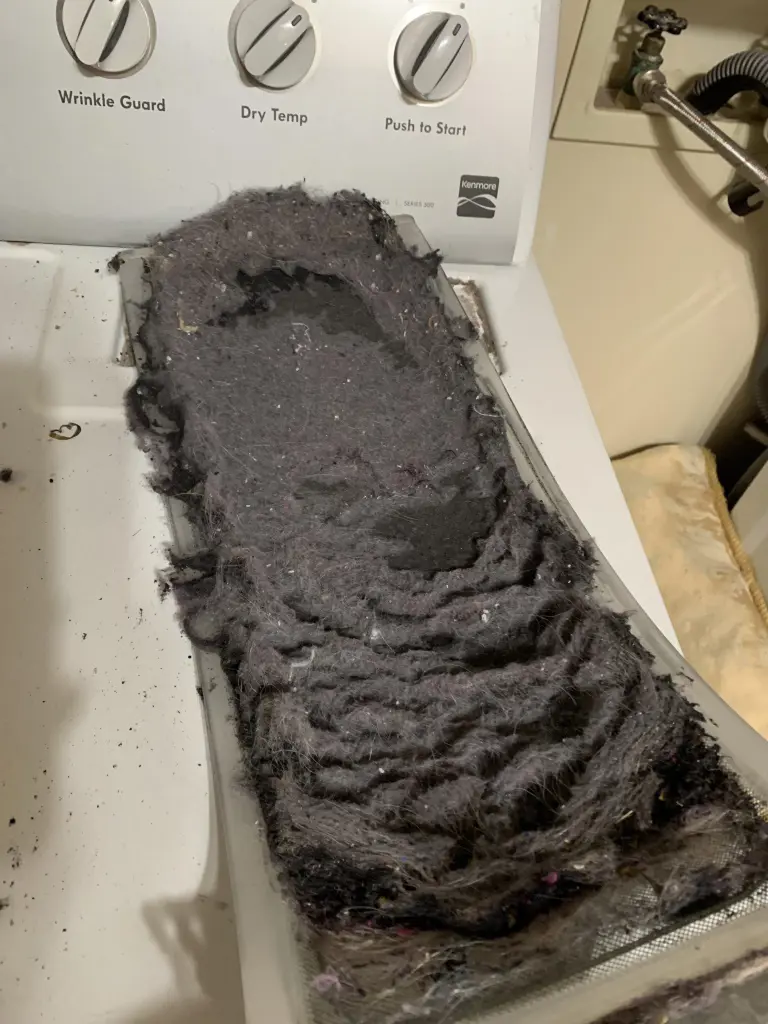
Vent clogs don't happen overnight; they develop gradually in stages, each worse than the last. Initially, you might notice your clothes taking longer to dry or your laundry room feeling unusually humid.
As the blockage worsens, you'll likely find your dryer getting extremely hot to the touch, and you might even notice a burning smell during operation. In severe cases, the blockage can become so complete that your dryer's safety features kick in, shutting down the heating system entirely.
The danger here isn't just about wet clothes – a clogged vent is a serious fire hazard. Warning signs include finding lint around the door seal, excessive humidity in your laundry room, and clothes needing multiple cycles to dry completely.
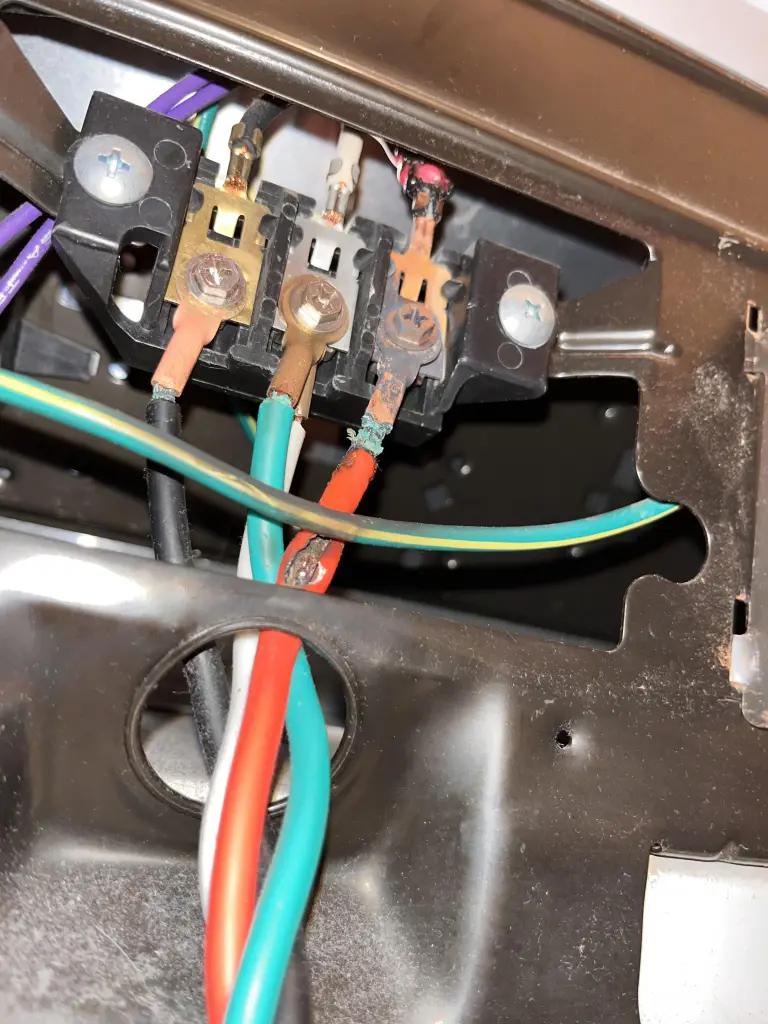
5. Broken Power Cord
While a dryer's power cord may look simple on the outside, there are a lot of different wires inside this component and each wire is necessary for functioning.
These cords will break down over time from being repeatedly bent, crushed, and sometimes just through normal wear and tear.
Watch for warning signs like the cord feeling hot during operation, visible damage to the outer coating, or your dryer working intermittently when the cord is moved. If you notice a burning smell coming from the plug area, this is a serious red flag that requires immediate attention.
The gas system needs to be in perfect condition for your dryer to produce heat. They can be simple problems such as someone accidentally closing the gas valve or a kinked gas line or complex problems with the gas valve itself or solenoid.
Sometimes the gas pressure is too low, or the gas line is blocked or improperly sized. A properly functioning gas dryer should light quickly and maintain consistent heat.
If you hear clicking but don't feel heat, or if there are long delays between when you start the dryer and when it begins heating, these are signs of gas supply problems.
Most importantly, if you ever smell gas around your dryer, take immediate action – open windows, avoid operating any electrical switches, and contact your gas company right away.
Most dryers actually have multiple thermostats working together like a team of temperature guards. The operating thermostat acts like a conductor, orchestrating the normal heating cycles by turning the heat on and off to maintain the right temperature for your selected setting.
When this fails, it usually either sticks open (resulting in no heat in dryer) or closed (causing too much heat). Then there's the high-limit thermostat, which serves as a backup safety system, cutting power if temperatures get dangerously high.
These thermostats can fail gradually or suddenly, leading to various symptoms like inconsistent heating, clothes getting too hot or not hot enough, or complete heating failure.
Located near the door frame, this switch is designed to immediately cut power to most dryer functions when the door is opened. When working correctly, it seamlessly coordinates with the door to allow operation only when everything is securely closed.
Problems often develop gradually: first, you might notice the dryer becoming finicky about starting, or you might hear unusual clicking sounds when closing the door.
Sometimes the switch can become clogged with lint, or its electrical connections might weaken over time. In other cases, the door might become slightly misaligned, preventing the switch from engaging properly.
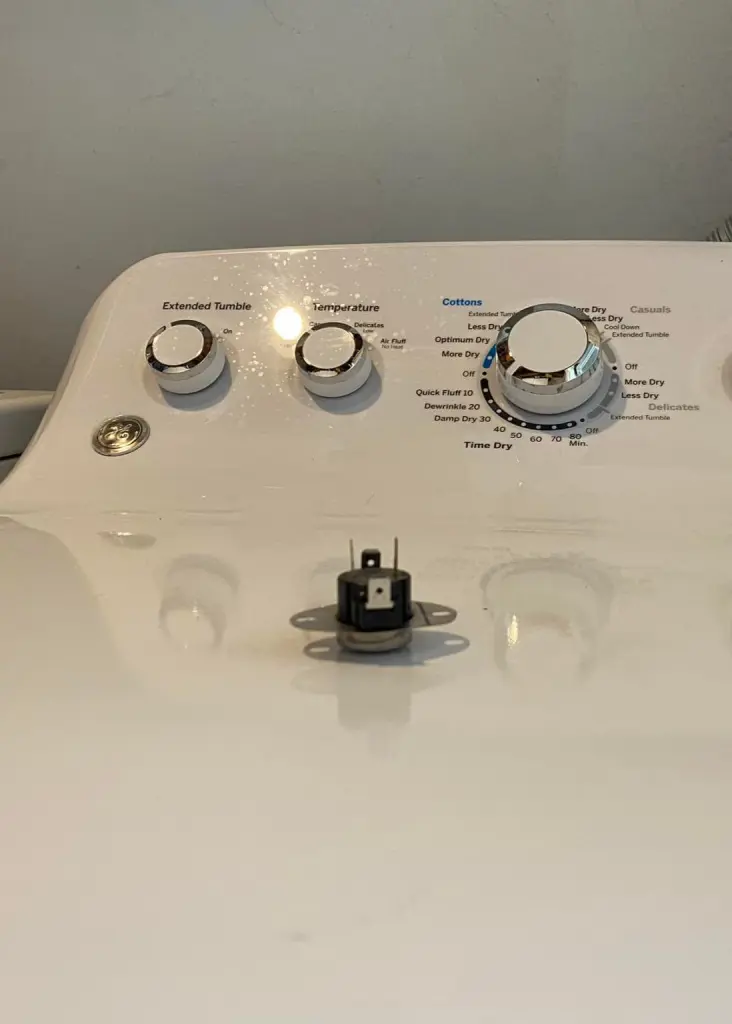
This component manages multiple functions simultaneously: controlling how long your dryer runs, determining when to apply heat, deciding when to cool down, and coordinating the various cycles for different fabric types.
When a timer starts failing, it can cause all sorts of confusing problems. You might find cycles ending too early, leaving you with damp clothes, or running too long and over-drying your laundry.
Sometimes the timer might stop advancing altogether, leaving your dryer running indefinitely. The first signs of timer problems often include unusual noises when you turn the dial, cycles that don't match their stated duration, or programs that skip certain phases entirely.
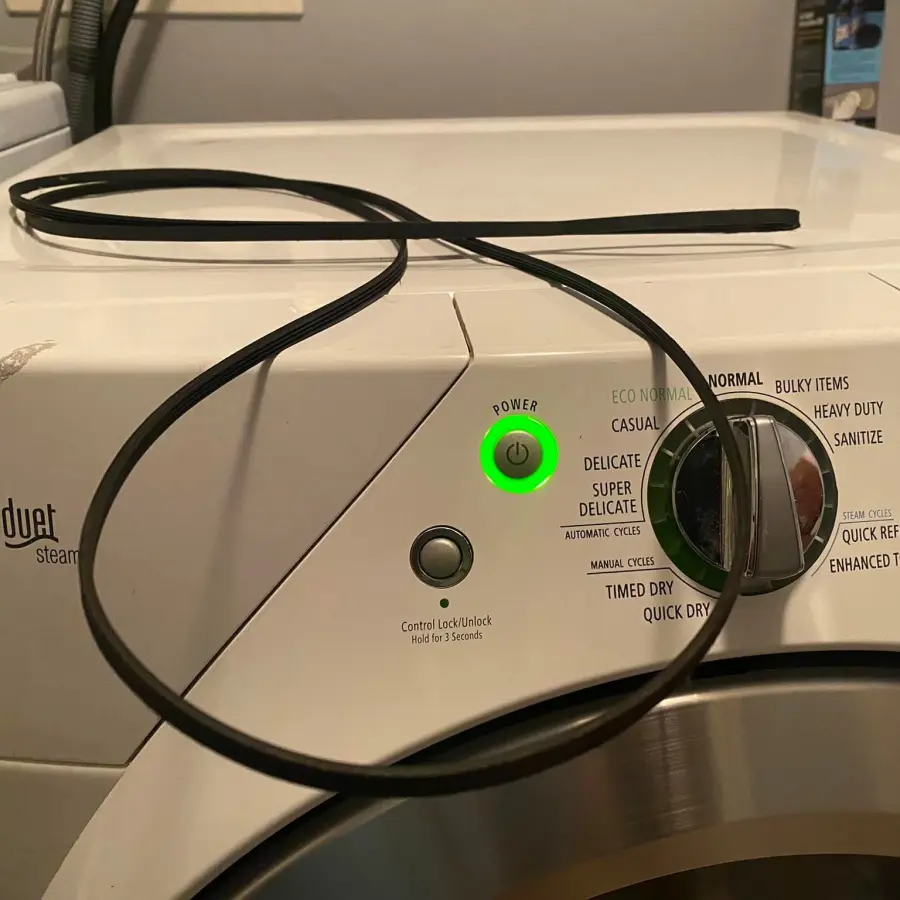
It’s a big rubber band called a drive belt that connects the motor to the drum so that the tumbling action that’s necessary for your clothes to dry is engaged.
So when this belt is working correctly, it aids in creating the ideal tumbling motion of your clothes, moving and drying evenly. However, over time, these belts can wear out, crack, or snap completely.
A broken belt often announces itself with a distinctive loud bang or pop, followed by the drum refusing to turn even though you can hear the motor running.
Before completely failing, a belt might give you warning signs like squealing sounds during operation, a burning rubber smell, or clothes taking longer to dry because they're not tumbling properly.
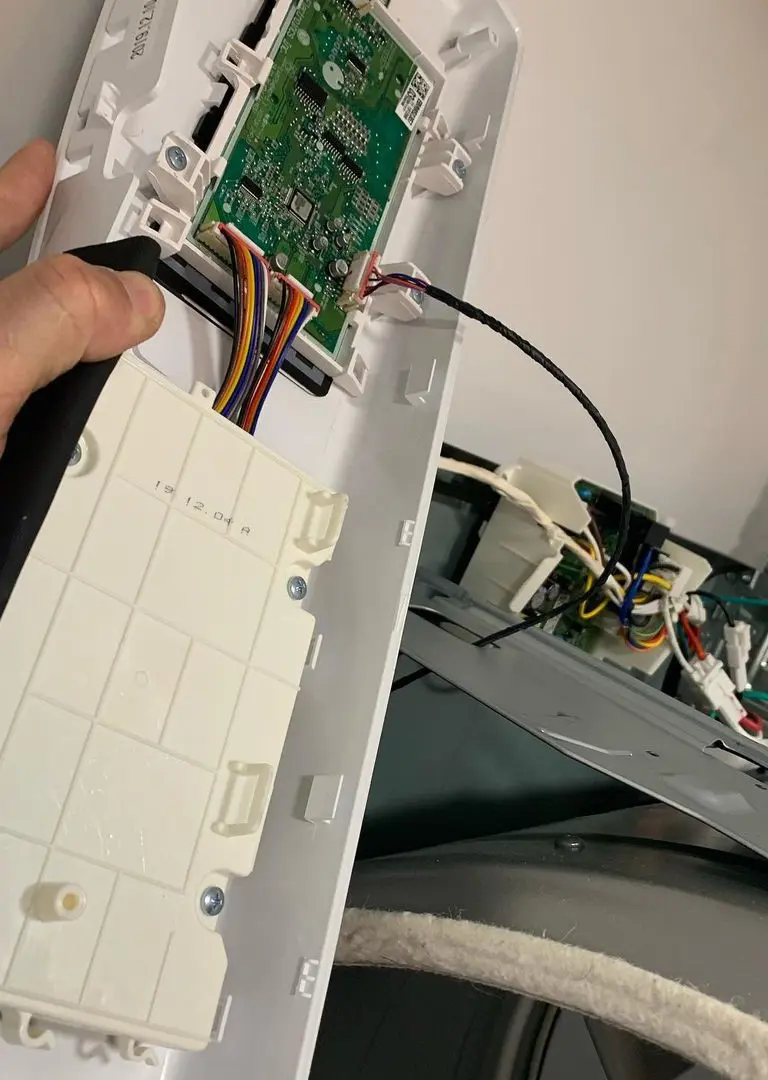
Consider the control board as your dryer's brain - it's a computer that manages everything from cycle timing to temperature control. Like any computer, it can develop problems that affect its ability to communicate with and control other components.
These issues often start subtly: maybe certain buttons stop working, or the display begins showing strange symbols.
As problems progress, you might notice more serious symptoms like cycles starting and stopping randomly, heat levels becoming erratic, or multiple functions failing simultaneously.
Moisture, heat damage, or power surges can all cause control board problems. Sometimes you'll see obvious signs of damage like burnt spots or loose connections, but other times the failure happens at the microscopic level.
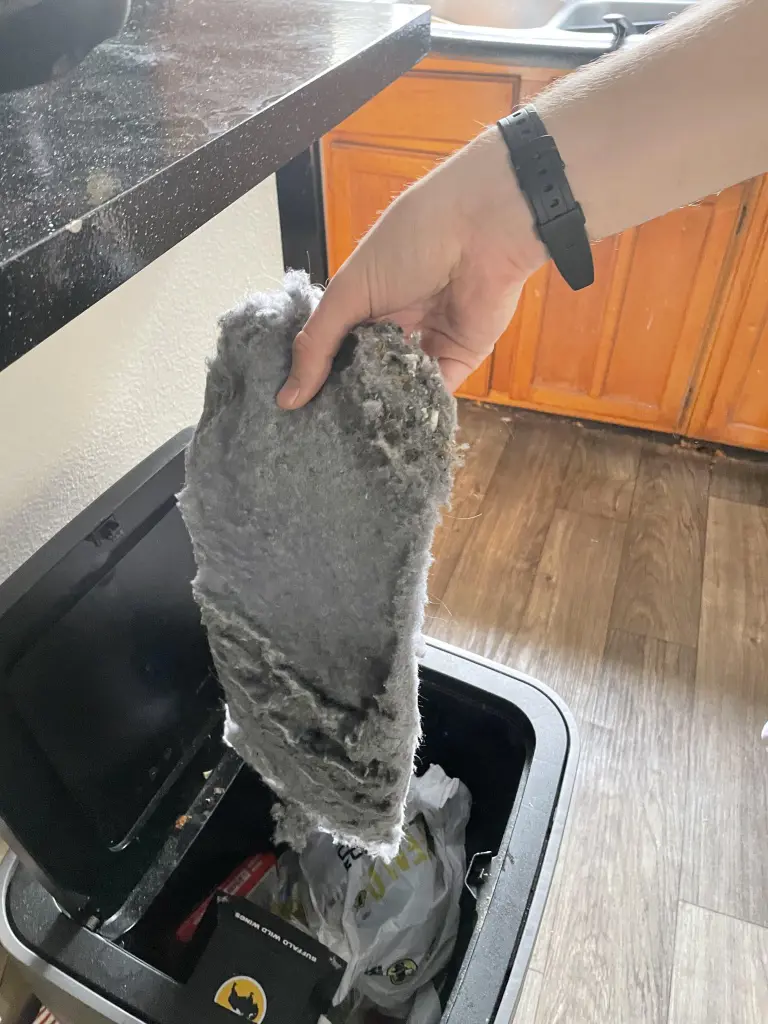
This screen traps tiny fibers from your clothes every time you dry a load of laundry. The fibers can also become compacted if you use fabric softener sheets, which can leave an invisible, sticky residue that traps more lint.
As the screen clogs and airflow is restricted throughout your dryer, this makes your dryer work harder and longer to dry clothes. Not only it wastes energy and time, but it can also result in overheating and even dangerous situations.
How To Fix Dryer That Won't Heat
Most whirlpool dryers not heating need professional help to get fixed. But if you're handy, there are also steps and solutions that can easily be fixed by yourself.
Always remember that safety comes first - unplug your dryer or turn off the power at your circuit breaker before attempting any repairs. For gas dryers, make sure to turn off the gas supply first. However, these are some easy fixes that you can try first if there's no heat in clothes dryer:
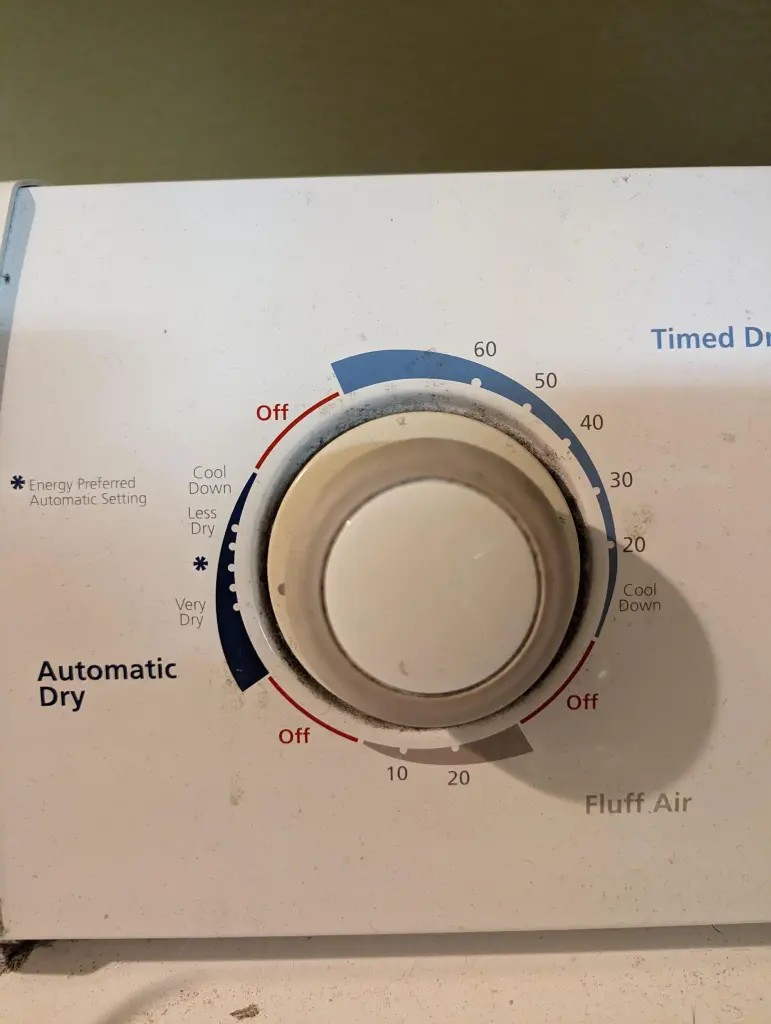
1. Check Your Basic Settings
Before diving into complex repairs, start with the simplest things. Sometimes the solution is right in front of you. Make sure your dryer isn't set to 'air fluff' or 'no heat' cycle.
Check if the start button was properly pressed and the door is completely shut. These might seem obvious, but they're common reasons why cloth dryer not heating.
One of the more common causes of heating problems is a clogged lint system. Check the lint screen and remove it; clean thoroughly — you don’t want to just brush off the visible lint.
To remove the invisible buildup from fabric softener sheets, wash the screen with warm soapy water and a soft brush. While the screen is drying, vacuum deep inside the lint trap housing. This simple maintenance can often restore proper heating.
For electric dryers, check your circuit breakers. Unlike most appliances, electric dryers need two circuit breakers to work properly - one for the motor (to tumble) and one for the heating element.
Sometimes one breaker trips while the other stays on, which is why your dryer might tumble but not heat. For gas dryers, verify the gas valve is fully open, as these valves can sometimes get accidentally turned to a partially closed position.
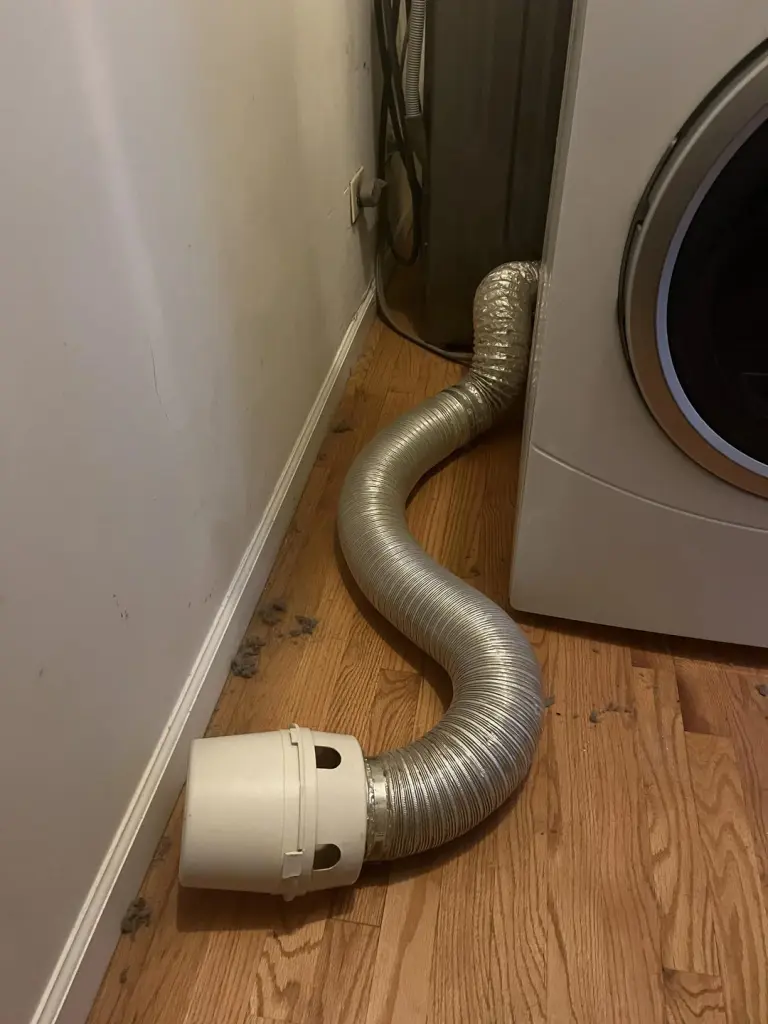
4. Examine Your Vent System
A major cause of poor heating is poor venting. Begin by walking back from your dryer, tracing the vent pipe as it runs to where it exits your home. Look for:
Crushed or kinked vent hoses
Lint buildup inside the pipe
Blocked outside vent covers
Disconnected vent sections: Sometimes just straightening a kinked vent hose or cleaning out a clogged vent can solve your heating problems immediately.
5. Listen To Your Dryer
If your dryer makes unusual sounds, this can help identify the problem. A loud rumbling might mean a belt issue, while clicking sounds during heating cycles in gas dryers could indicate igniter problems.
Understanding these sounds can help you decide if it's something you can fix or if you need professional help.
6. Check The Door Seal
Your dryer door seal works a lot harder than you think. If the door seal is damaged or worn out it lets hot air escape, so the dryer seems not to be heating properly.
Feel the entire door seal with your hand, running it across the seal looking for any damage, or tears, or hardened spots. If the seal is damaged, warm air leaks out instead of drying your clothes.
Keeping a maintenance kit on hand is helpful since replacing a door seal is usually a simple fix that you can do yourself - just make sure you get the right seal for your dryer model.
Sometimes the problem lies with the temperature control system. When your thermostats fail, your dryer might not heat at all, or it might heat erratically.
You can test thermostats with a multimeter, however it is tricky because the location of thermostats differs by model. If you find a bad thermostat, replacing it is usually straightforward - just be sure to get the exact replacement part for your model.
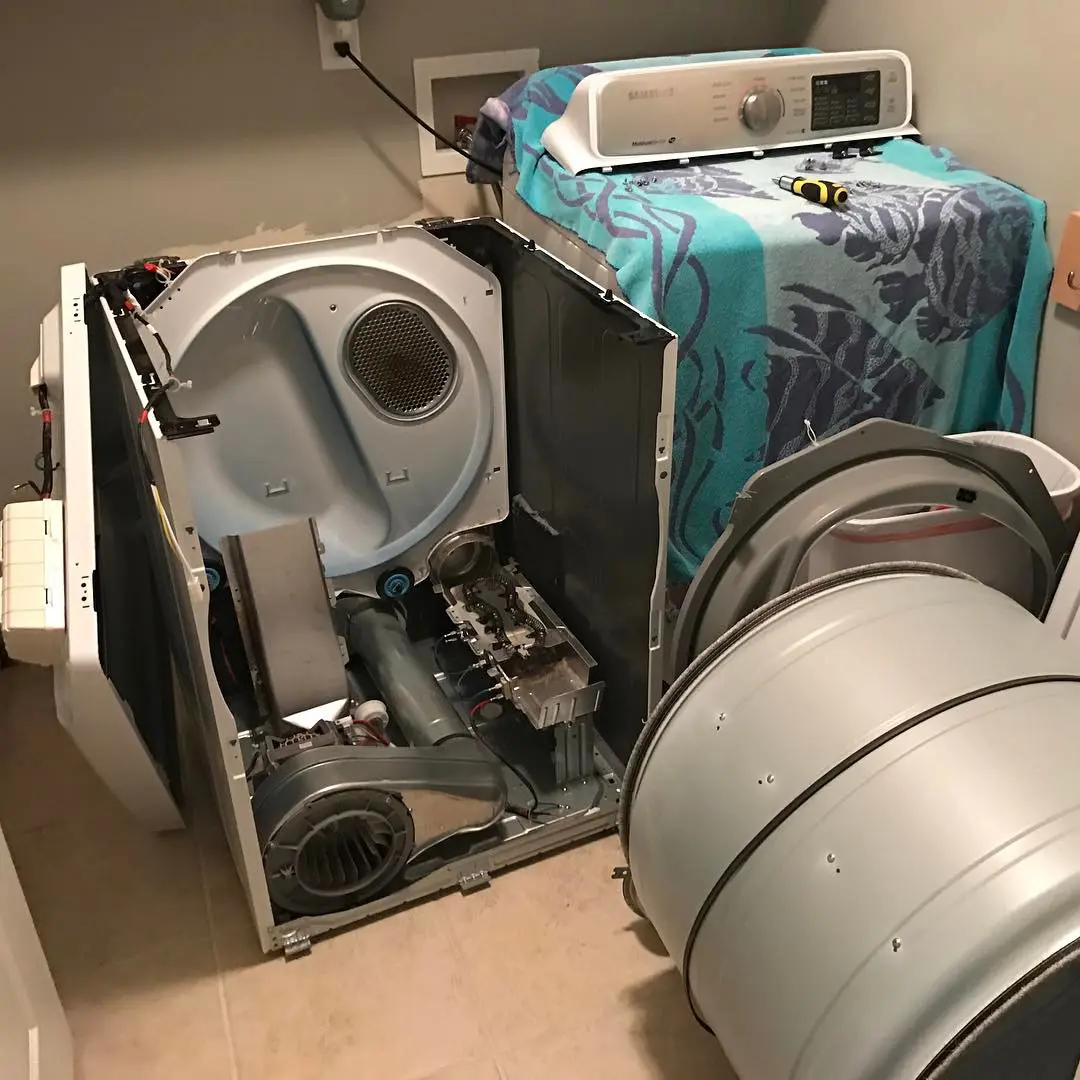
When To Call A Professional
If you’ve already done the basic troubleshooting by checking the power cord and cleaning the lint trap, if the dryer still isn’t working, call a repair expert.
If you hear strange noises from the dryer like grinding or squealing, you smell burning, or the drum isn’t turning, it’s probably a sign that there is something wrong inside your dryer, and that it probably requires professional attention.
A repair expert has fixed hundreds of dryers and knows exactly how to handle tricky problems like broken motors, worn-out belts, or faulty heating elements.
They'll figure out what's wrong and fix it right the first time, saving you from the headache of dealing with wet clothes. Plus, trying to fix complex internal parts yourself could make things worse or even be dangerous.
Maintenance Tips For Preventing Dryer Heating Problems
Maintenance is crucial to get your dryer heating properly and evading much more costly repair bills down the line. Here are some essential tips to hinder such problems in the future:
1. Clean the Lint Screen Every Time
Don't just run your dryer without checking the lint screen. Remove and clean it before or after every load. This simple habit makes a huge difference in how well your dryer heats and how efficiently it works.
2. Don't Strain Your Dryer
If you stuff your dryer with too much clothing, it is like trying to breathe in a congested elevator — nothing works right. Allow your clothes room to tumble freely.
If your hand won’t sit over your clothes when they’re in the dryer, you have too much in there. Overloading makes your dryer work harder and heating problems.
3. Vacuum Around and Under Your Dryer
That lint doesn't just get caught in the lint trap; it is everywhere. Vacuum out once a month (if you can safely do so) around and under your dryer. This prevents lint buildup that can affect performance and become a fire hazard.
4. Clean Your Vent Pipe Thoroughly
Every 3-4 months, disconnect your dryer vent pipe and clean it out completely. You can buy special brushes that attach to a drill to make this job easier. Start from both ends - inside where it connects to your dryer and outside where it vents.
5. Check Your Outside Vent Cover
Each season, go outside and check your dryer's exterior vent. Make sure the flap moves freely and isn't stuck open or closed. Remove any lint, leaves, or debris that might have collected there. In winter, make sure snow isn't blocking it.
6. Sort Your Loads Properly
Group similar items together. Heavy towels should dry with heavy towels, light items with light items. This helps your dryer work more efficiently and prevents overworking the heating system.
7. Use Dryer Balls
Add wool or rubber dryer balls to each load. They help separate clothes, allowing better airflow and faster drying times. This means less strain on your heating element.
8. Annual Professional Inspection
Once a year, consider having a professional check your dryer, especially if it's a gas model. They can: