Cooking clams might sound like an intimidating task for many but with little guidance, you can create a delicious and flavorful dish that can impress anyone. Their versatility in cooking makes them a popular ingredient in a variety of dishes, from classic clam chowder to simple steamed clams.
Steamed clams are a classic seafood treat, loved for its tender meat and briny flavor. This guide will walk you through everything you need to know to cook the best-steamed clams, from selecting the clams to perfecting the steaming process.
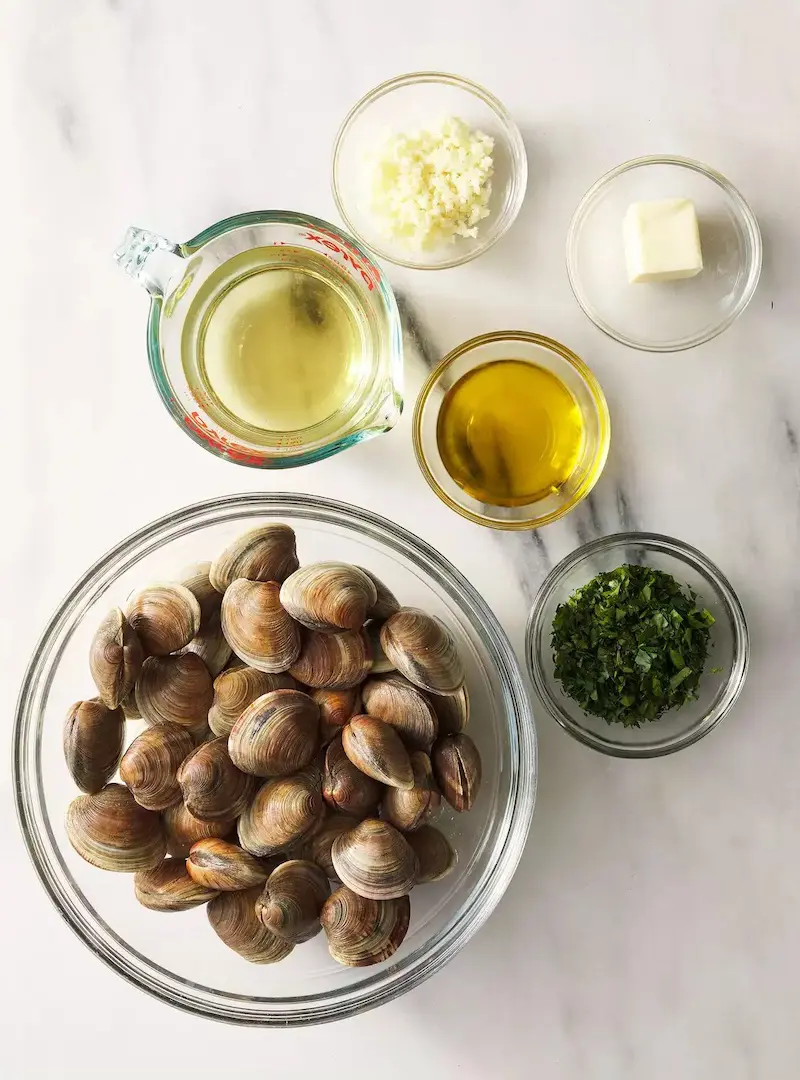
Ingredients for Perfect Steamed Clams
Steaming clams is a simple process that involves combining fresh clams with a few aromatic ingredients and liquid to create a deliciously savory dish. Here is a list of everything you need to make perfect steamed clams.
The first step in making the best steamed clams is choosing the right ones. There are several types of clams, but the most common for steaming are littleneck, cherrystone, and Manila clams.
When purchasing clams, look for ones that are tightly closed. Open shells can be a sign that the clam is dead and should be avoided. Also, check for any broken shells, which could indicate poor handling or spoilage.
Butter (2-4 tbsp)
Butter enhances the overall flavor by adding richness and a silky texture to the broth. This creamy taste balances the saltiness of the clams and complements the flavors.
Fresh Garlic (3-5 cloves, minced)
Garlic adds depth and gives a fragrant aroma to the broth that enhances the brininess of the clams and adds complexity to the dish.
Shallot (1 bulb, finely chopped)
It adds a subtle flavor that is less pungent than regular onion with a touch of sweetness that balances salty and savory notes.
White wine, chicken stock, or water (1 cup)
White wine adds acidity and a fruity, slightly tangy flavor that complements the clams and enhances their natural taste. If you’re using chicken stock instead, it adds a rich umami depth to the broth but if you decide to use water, it provides a neutral base letting other ingredients shine.
Lemon Juice (1tbsp)
The acidity from the lemon juice cuts through the richness of the butter and complements the briny clams, enhancing overall freshness of the dish.
Salt and pepper to taste
Salt enhances natural flavors of the clams and other ingredients while pepper adds a touch of heat and complexity.
Fresh Parsley (chopped, for garnish)
The fresh herbal note adds to the freshness of the dish with a burst of flavor and color.
Lemon (wedged, for garnish)
Served as an optional garnish, lemon wedges will allow you to add acidity to your dish according to your preference.
Red pepper flakes (optional)
The pepper flakes add a spicy kick to the broth which can provide a nice contrast to the sweetness of the clams.
Equipments Required
To make your steamed clams, you will need the following equipment:
Colander or Strainer: Use a colander or strainer to rinse and clean the clams before cooking. This will help remove any sand or grit from the clams. It is also useful for draining the clams once they're cooked.
A Large stockpot: You can steam clams on a large skillet, braiser, or Dutch oven as it is essential for steamming the clams evenly. Ensure that the pot has a tight-fitting lid to trap the steam. You can opt for the one with a heavy bottom to distribute heat evenly and prevent burning.
Steaming rack or basket: You can use a steaming rack or basket to elevate the clams above the liquid allowing steam to circulate and cook them evenly. This keeps the clams from sitting directly in the broth, which is ideal for achieving tender and properly steamed clams.
Kitchen Stove: The stove is essential for heating the pot and creating steam. It allows you to control the temperature and maintain a consistent boil, which is crucial for evenly cooking the clams. Ensure that your pot fits well on the burner for optimal heating.
Measuring Spoon: Measuring spoons are important for accurately adding ingredients like lemon juice and salt. They help you maintain the right balance of flavors in your dish. Using the right measurements ensures consistency and enhances the overall taste.
Knife and Cutting Board: A knife and cutting board are necessary for preparing your ingredients. You’ll use them to finely chop the shallot and mince the garlic. A sharp knife and a sturdy cutting board make the prep work quicker and safer.
Ladle or slotted Spoon: A ladle or a slotted spoon is handy for serving the clams and broth. It allows you to scoop out calms and strain out excess liquid, if necessary.
Serving Bowl: A serving bowl is useful for presenting the steamed clams once they’re cooked. It can also be used to collect the clams and broth from the pot, making it easier to serve and enjoy. Choose a bowl large enough to hold all the clams comfortably.
Timer: A timer helps you keep track of cooking time, ensuring the clams are steamed just right. It’s particularly useful to avoid overcooking. Set it according to the recipe or your preference to maintain optimal texture and flavor.
How to Steam Perfect Clams
Steaming clams is a simple process but the key to great clams lies in how you flavor and cook them. Here is a step-by-step guide to achieving the perfect steamed clams.
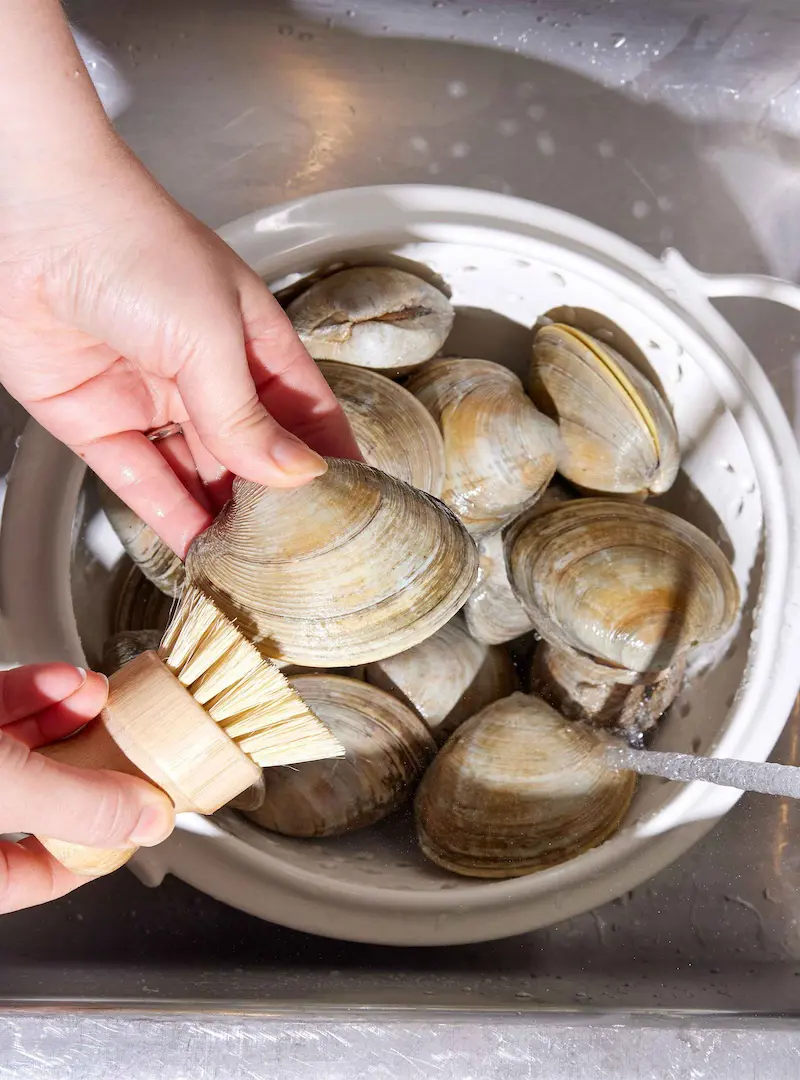
1. Cleaning the Clams
Before cooking, it’s essential to clean and prepare your clams properly. Clams are filter feeders, so they can contain sand and grit that need to be removed before cooking.
Place the clams in a large bowl and rinse them under cold water. Use your hands or a brush to scrub the shells gently to remove any surface dirt. To expel any sand or grit, soak the clams in a bowl of cold water with a little bit of salt for about 20 minutes. The clams will filter out the sand as they breathe, which will then be expelled into the water.
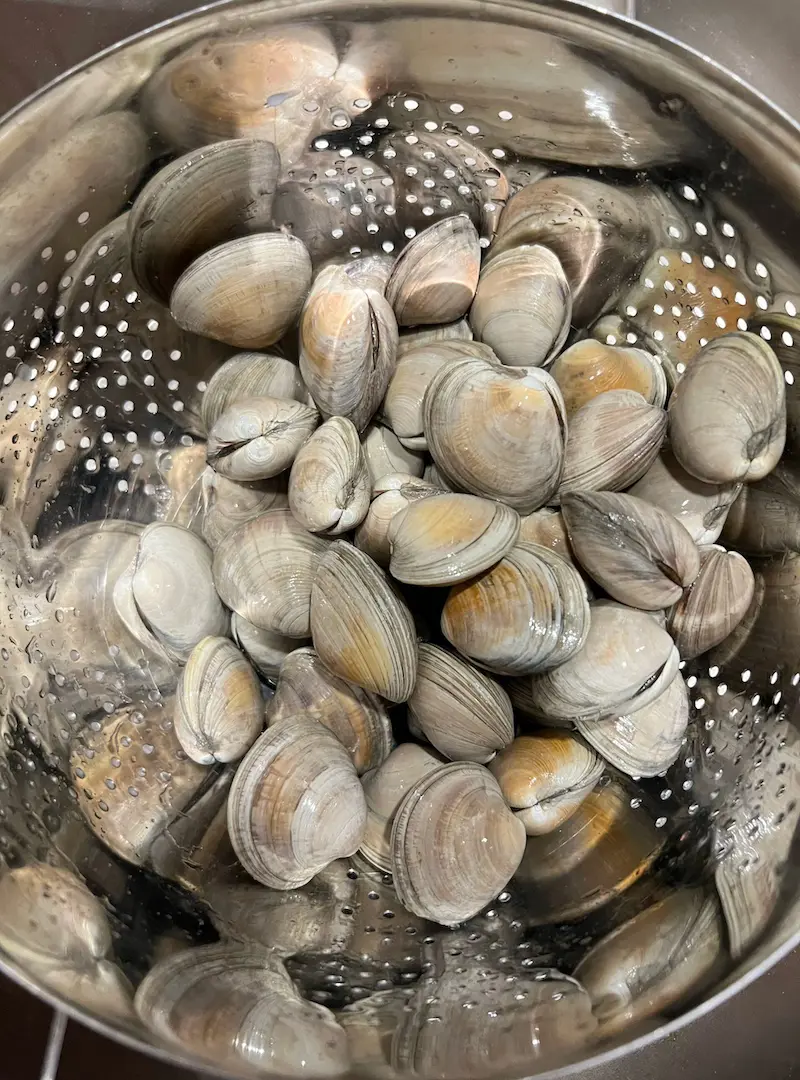
After soaking, drain the water and rinse the clams under cold water again. Discard any clams that remain open after being tapped or have cracked shells.
While your clams are soaking, prepare your other ingredients. Shellfish love alliums which are aromatics like onions, garlic, shallots, leeks or scallions and pair well together. However, if you only prefer garlic, that’s fine too.
While you’re at it, you can also finely chop fresh herb of your choosing. The recipe calls for fresh parsley, but basil or chives would also taste great.
3. Preparing the Steamer
Any large pot with a tight-fitting lid would work just fine and a steaming rack or basket. If you don’t have a dedicated steamer, you can use a colander that fits into the pot.
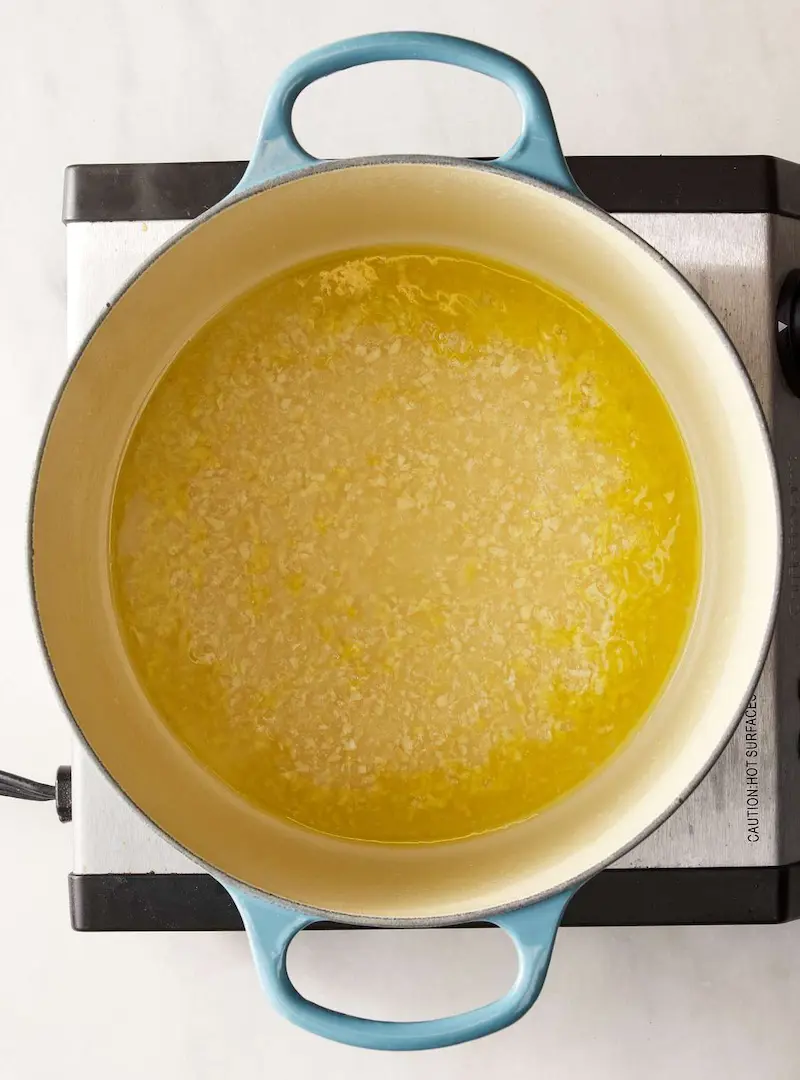
In the pot, add butter, minced garlic, and chopped alliums, like shallots or onion, of your choice and sweat your aromatics until fragrant and make sure not to caramelize them.
Once your aromatics have softened, add white wine or broth of your choice and bring this mixture to a simmer over medium heat. The wine will create a flavorful broth that the clams will steam in.
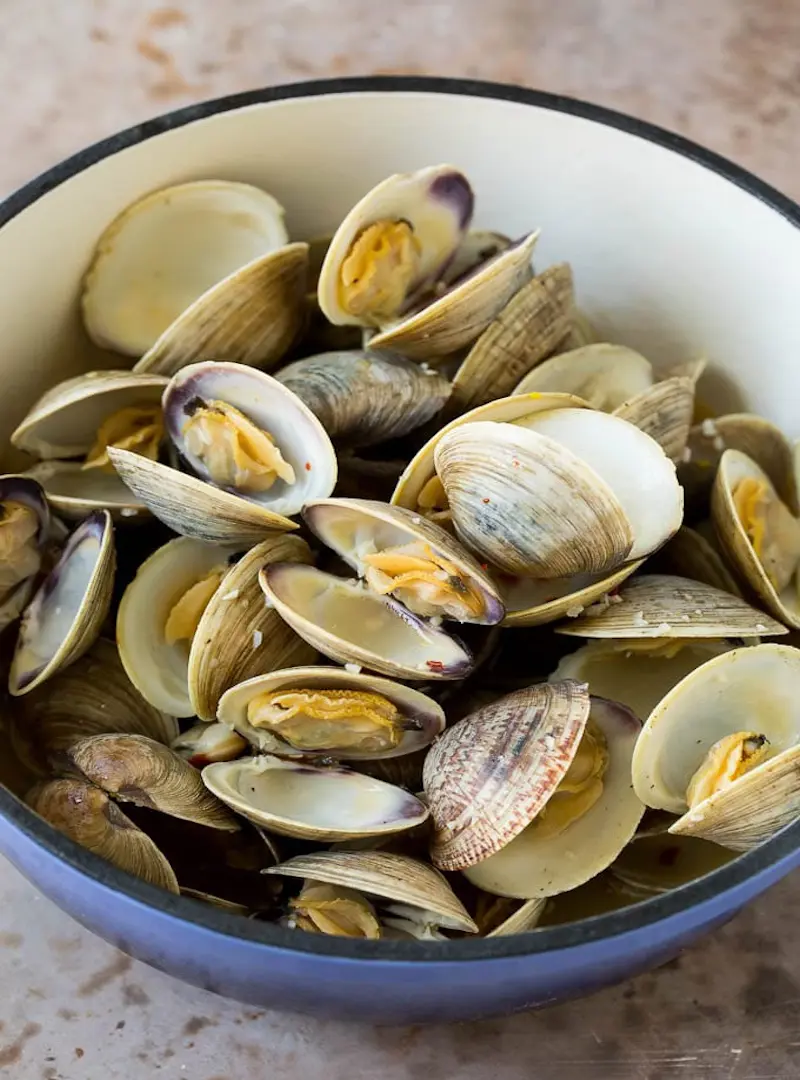
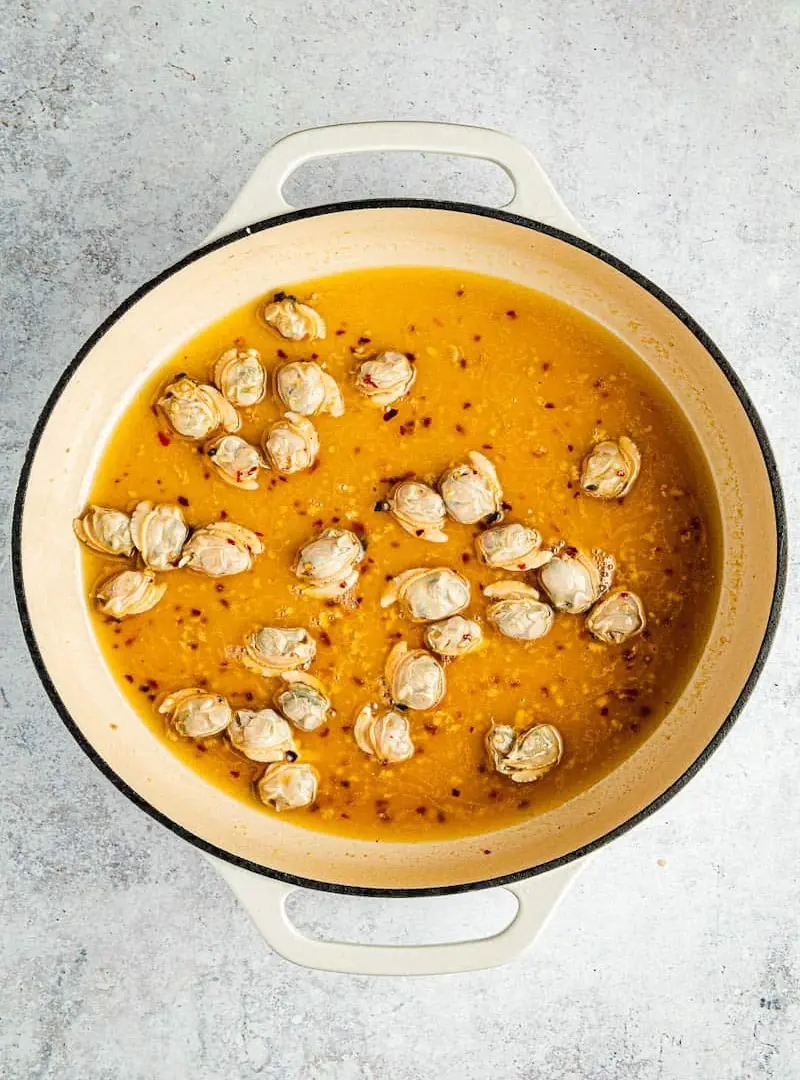
Once, the broth starts to simmer, place the clams carefully in the steaming rack or basket and set it over the simmering broth. Cover the pot with the lid. Steam the clams for about 5 to 7 minutes, or until the shells have fully opened.
You can also give the pot a gentle shake every few minutes to ensure even cooking. Be careful not to overcook them, as this can make the meat tough.
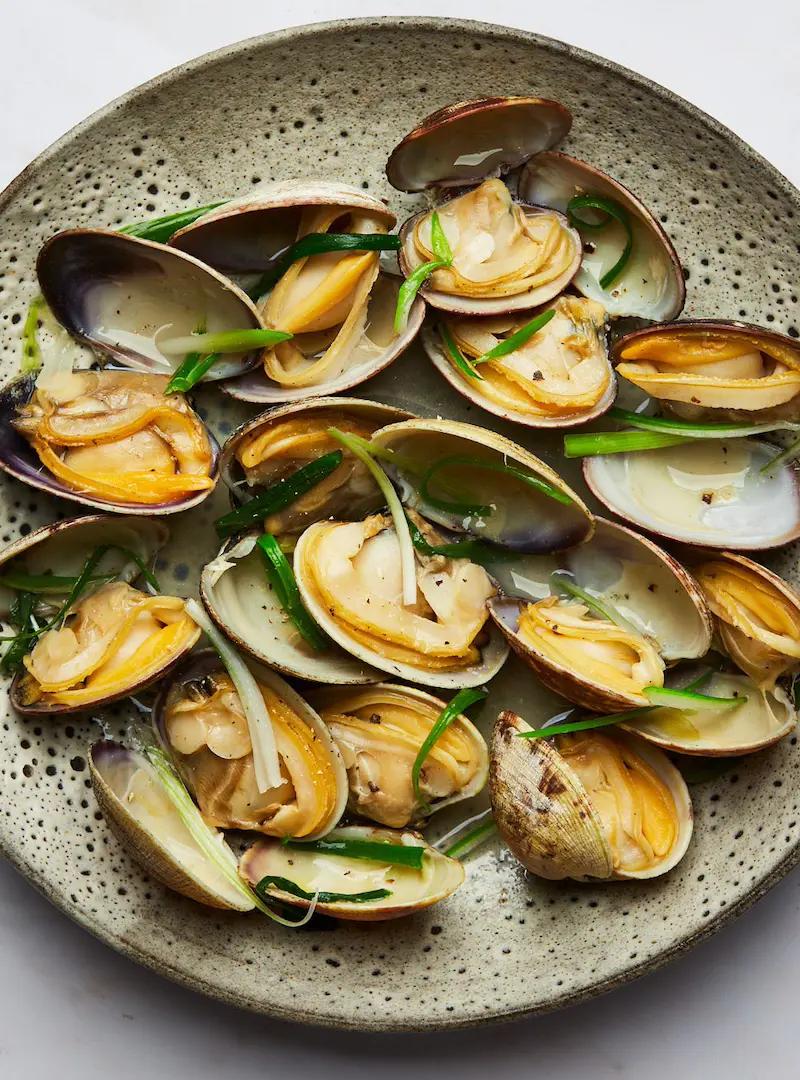
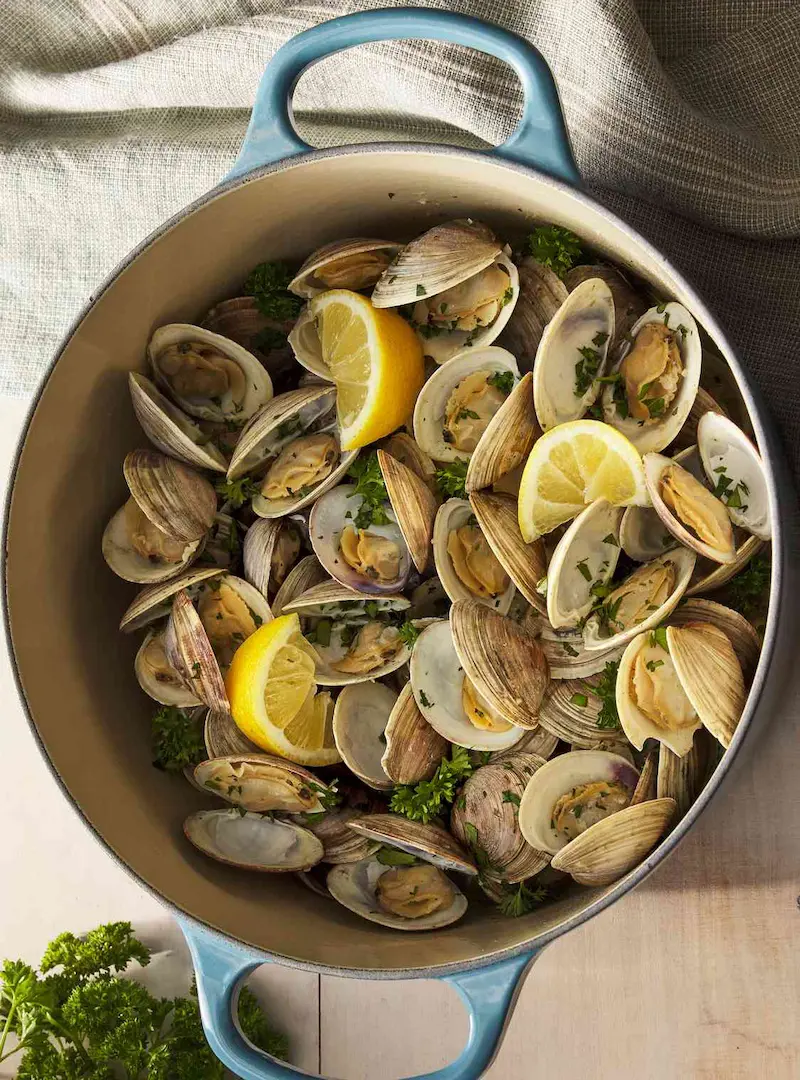
Once the clams are opened, remove them from the pot and place them in a serving bowl.
Discard any clams that haven’t opened, or you can cover the pot again and give it a few more minutes on the heat. If a clam never opens, you can discard it as they might be unsafe to eat.
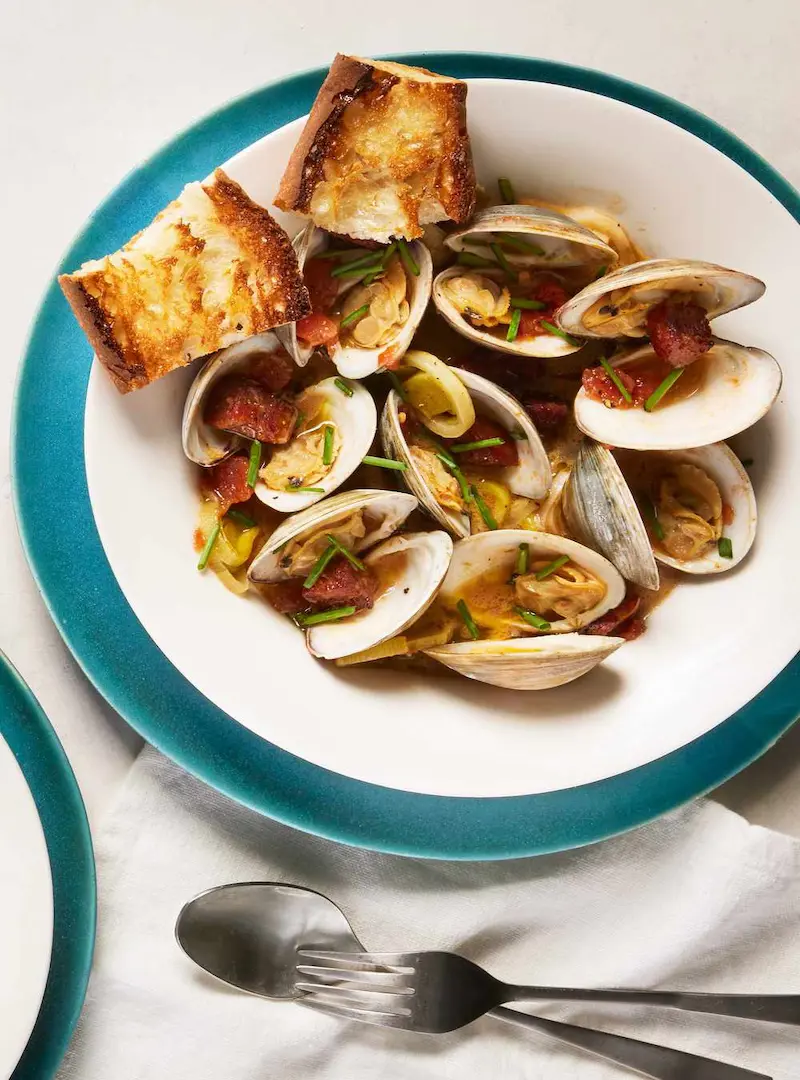
Ladle some of the steaming broth over the clams for added flavor. Season with salt, pepper, and optional red pepper flakes.
Garnish with fresh parsley and lemon wedges on the side. Serve with a French baguette or over a bed of cooked pasta.
Cooking Clams and Checking for Doneness
Cooking time depends on the size of the shellfish and can be anywhere from 4 to 10 minutes to steam clams. Be sure not to boil the clams or they can become tough, a gentle simmer is all that is needed.
Cover and let cook over medium heat. Clams will let you know when they're ready; the clams are cooked through when the shells have opened. Watch closely and do not overcook them or they will turn too chewy and rubbery.
Cook until shells pop open wide, that's the best way to tell when they're done. When steaming, keep liquid at a minimum so the mollusks aren't boiled.
The process of preparing clams without their shell offers a convenient approach to cooking seafood. Here's how you can prepare and cook clams without their shells:
When using clams that are removed from their shell, or pre-shucked clams, it can save time and effort. If you're using frozen clams, thaw them in the refrigerator for 12-24 hours until completely thawed.
When using fresh pre-shucked clams, rinse the clam meat under cold water to remove any sand or grit.
Clams cook quickly, so it is best cooked, gently, over low-medium heat on a skillet. Heat your oil of choice or butter and sauté minced garlic, shallots and other aromatics until they become fragrant.
Add the clam meat and cook briefly. Additionally, you can deglaze the pan with white wine or chicken broth, allowing the liquid to reduce. For a creamier sauce, you can incorporate heavy cream into the recipe, letting it simmer until it thickens.
You can also add raw shucked clams directly to soups and chowder at the very end of the cooking process when the soup/chowder is very hot.
Even with the best intentions, you might encounter some issues when cooking clams. Here’s how to address common problems:
Clams Not Opening: If some clams don’t open after steaming, it’s usually a sign that they were dead before cooking. Discard these clams, as they might not be safe to eat.
Overcooked Clams: Overcooking can make clams tough and chewy. To prevent this, keep an eye on the steaming time and check the clams frequently.
Sandy Clams: If you still find sand in your clams despite soaking, it could be due to insufficient soaking time or improper cleaning. Make sure to soak the clams long enough and rinse them thoroughly.
How to store Clams
Uncooked
It is recommended that you buy your clams the same day that you plan to cook them. If you need to store clams, make sure to take them out of the bag they came in. You can place them in an uncovered bowl or colander over a bowl and cover them lightly with a damp towel and put them in the refrigerator until you are ready to use them.
Do not store them in a sealed bag as it can suffocate them and do not put them in water unless you are ready to clean and cook with them, this is because fresh water kills clams.
An hour or two before you are ready to cook them, take them out of the refrigerator and rinse them thoroughly in the sink.
Cooked
This dish is best when served immediately after cooking. Leftovers will stay fresh in the refrigerator for up to two days in a covered container.
You can freeze cooked clams for up to three months, but many suggest that freezing can make them rubbery. If you do freeze clams, you can thaw them in a refrigerator for up to two days, but you shouldn’t refreeze them once thawed.
Flavor Variations and Serving Suggestions
Steamed clams are versatile and can be served in various ways:
The broth is perfect for soaking up with slices of crusty bread. Serve the clams with a loaf of French bread or sourdough to dip into the flavorful broth.
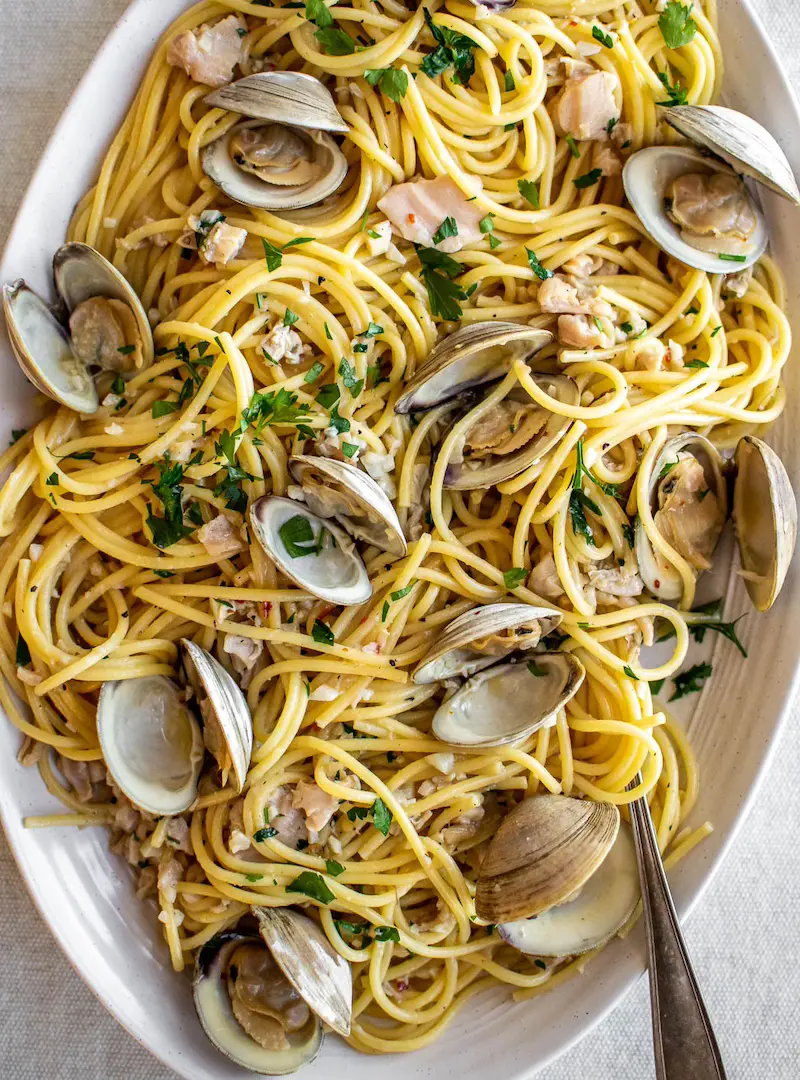
For a heartier dish, you can toss the steamed clams with pasta. A simple recipe involves cooking the pasta, then tossing it with the clams, some of the cooking broth, and a sprinkle of Parmesan cheese.
As Part of a Seafood Platter
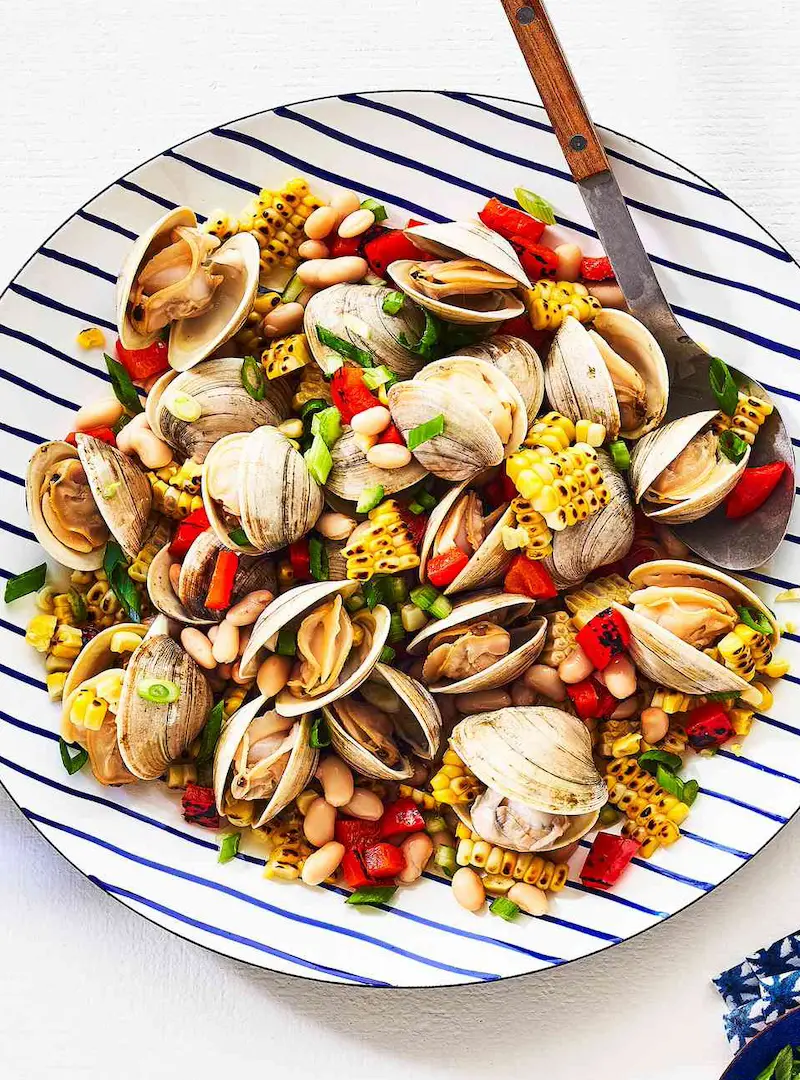
Steamed clams can be a delightful addition to a seafood platter. Combine them with shrimp, oysters, and mussels for a luxurious spread.
Clams can also be used in salads. Toss them with mixed greens, a light vinaigrette, and some cherry tomatoes for a refreshing seafood salad.
Cooking the best steamed clams is all about using fresh ingredients, preparing the clams properly, and mastering the steaming technique. By choosing high-quality clams and following these steps, you’ll be able to enjoy the flavors of the sea in a simple yet elegant and delicious dish.
Author
Editor
Biswas Kharel
Biswas Kharel is a food blogger and writer who brings a sharp eye and adventurous palate to every bite he writes about. Known for his thoughtful reflections and down-to-earth style, Biswas blends personal anecdotes with rich culinary insights—from quiet village kitchens to lively urban eateries.
His blog is a flavorful mix of travel, tradition, and honest food reviews, offering readers a window into the heart of every dish. For Biswas, writing about food isn’t just a passion—it’s a way of documenting life, one meal at a time.