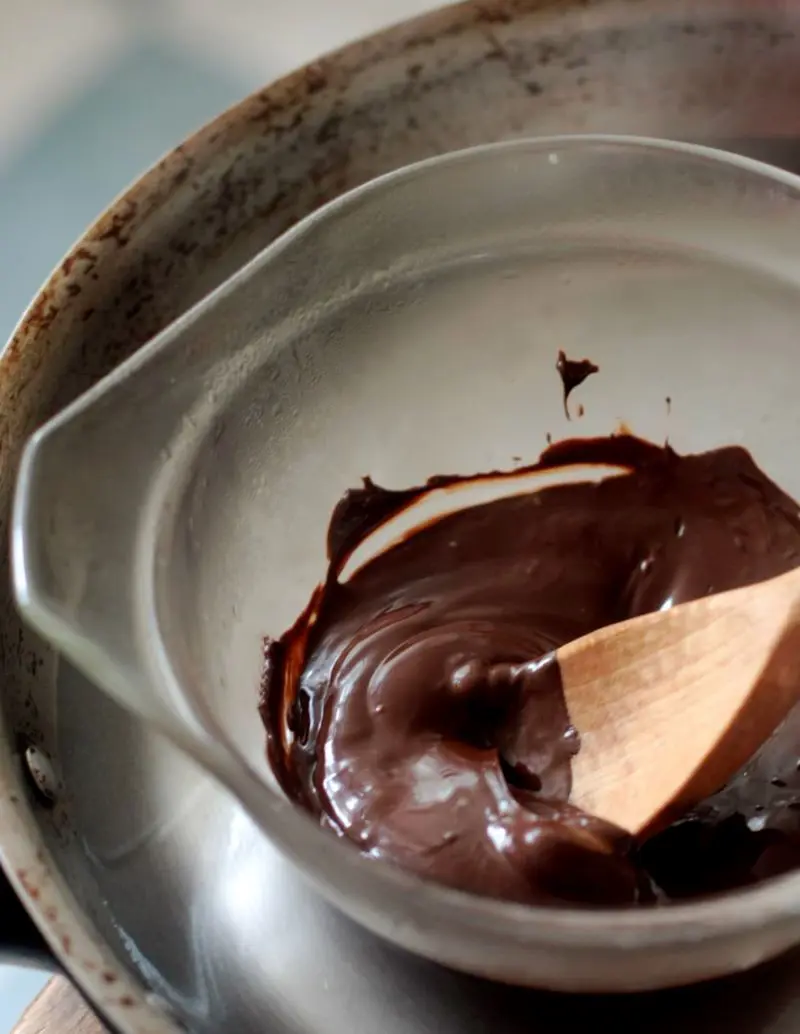
Melting chocolate is the first step in making many of your favorite treats. For instance, consider chocolate mousse, chocolate sauce, and ganache frosting. Melting chocolate chips or a chocolate bar may seem straightforward—just apply heat until it liquefies, right? Not so fast. Melting chocolate can be tricky.
If it gets too hot, it will burn; if it doesn’t get enough heat, it will become lumpy; and if it comes into contact with water, it will turn gritty and sludgy. So, what’s the best way to melt chocolate? If you’re wondering the same, here are five of the best methods for melting chocolate.
1. Melting Chocolate In The Microwave
If you're in a hurry, you can use the microwave to melt chocolate in just a few minutes. However, be careful not to overheat it, as this can cause the chocolate to seize and become lumpy with an undesirable texture. Here’s how to melt chocolate using the microwave:
What You'll Need
Microwave-safe bowl: Make sure it's safe to use in the microwave.
Spatula or spoon: For stirring the chocolate (rubber or silicone is best).
Microwave: For heating the chocolate.
Parchment paper or wax paper (optional): To place under the bowl if you want to avoid spills.
Instructions
Step 1: Prepare the Bowl
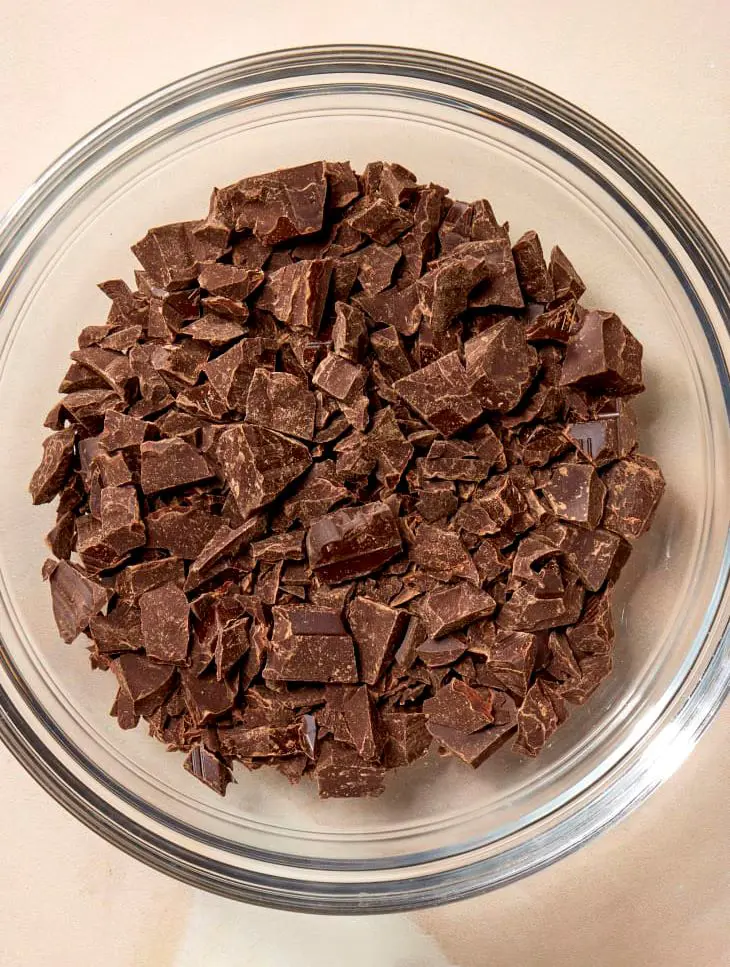
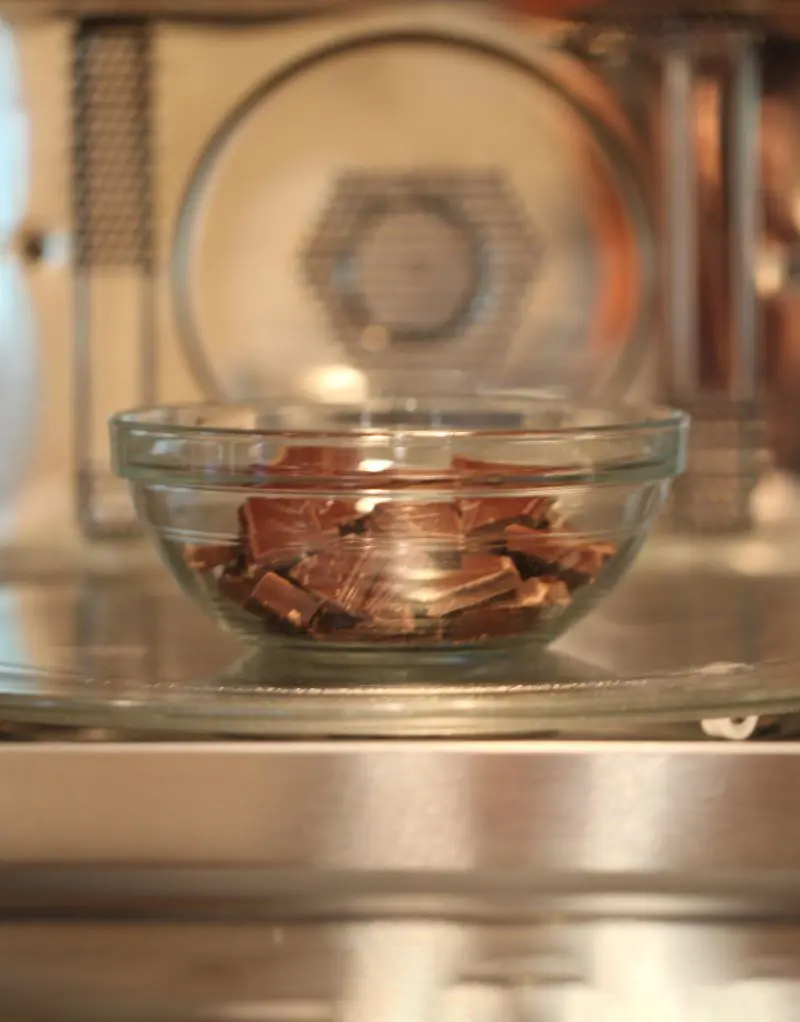
Choose a microwave-safe bowl to ensure it won’t get damaged in the microwave. Break or chop the chocolate into small, even pieces to help it melt evenly. Then place the chopped chocolate into the bowl, and make sure the bowl is dry.
Place the bowl in the microwave and heat it on low (50% power) for 30 seconds. Take the bowl out of the microwave and stir the chocolate with a spatula or spoon. Chocolate pieces might stay the same shape until stirred, so don't just rely on how it looks.
Using low power helps melt the chocolate slowly and evenly, reducing the risk of burning it. Remember to stir every 30 seconds to ensure it melts properly.
Put the bowl back in the microwave and heat it for another 15-30 seconds. Remove the bowl and stir. Continue this process until the chocolate is smooth and fully melted. Be careful not to overheat, as chocolate can burn quickly if left too long. Use the melted chocolate right away or let it cool if needed.
Melting chocolate in the microwave is effective and convenient. It’s quick, normally taking just a few minutes with occasional stirring for even melting. You only need a microwave-safe bowl and a spatula, which means fewer dishes to wash.
It's important to use low power settings and stir often to avoid burning the chocolate. Although this method is efficient and simple, it requires careful attention to prevent overheating. Overall, it’s a reliable choice for melting chocolate with minimal cleanup.
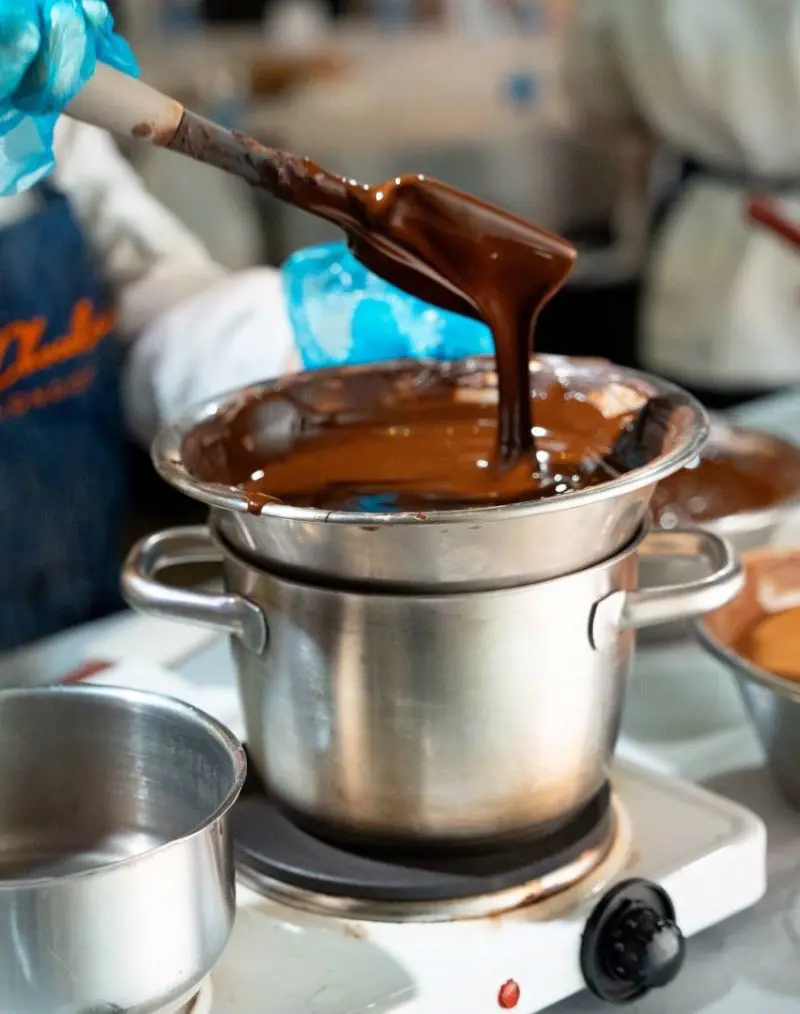
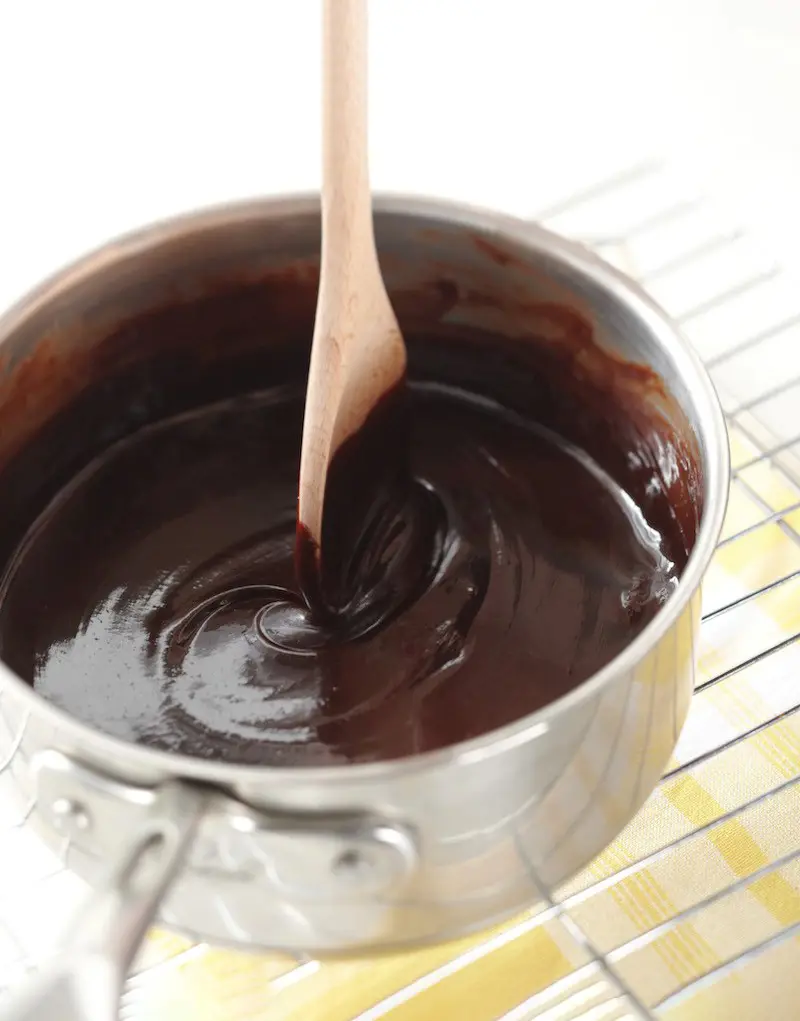
2. Melting Chocolate On The Stove
This is the traditional method for melting chocolate and it’s notably straightforward. Here’s a detailed step-by-step guide to help you through the process:
What You'll Need
A heatproof bowl (preferably glass or metal)
A saucepan
Heat-proof spatula or spoon
A heat source (stove)
Instructions
Step 1: Prepare Your Equipment
If you're using a bar of chocolate, chop it into small, uniform pieces. This helps the chocolate melt evenly and prevents it from seizing up.
You'll be using a double boiler method. Place a heatproof bowl over a saucepan. Ensure that the bowl fits snugly on top of the pan but doesn’t touch the water below. The steam from the simmering water will gently melt the chocolate.
Step 2: Heat the Water
Fill the saucepan with about an inch of water. The water should not touch the bottom of the bowl when it’s placed on top. Bring the water to a simmer over medium heat. Avoid boiling the water vigorously, as excessive steam or splashes could get into the chocolate.
Step 3: Add Chocolate to the Bowl and Melt
Place the chopped chocolate into a heatproof bowl. The bowl should be dry and free of any water or moisture, as water can cause the chocolate to seize. Next, set the bowl over a saucepan. The steam from the simmering water will gently heat the bowl and melt the chocolate.
Stir the chocolate occasionally with a spatula or spoon to ensure it melts evenly and to prevent scorching.
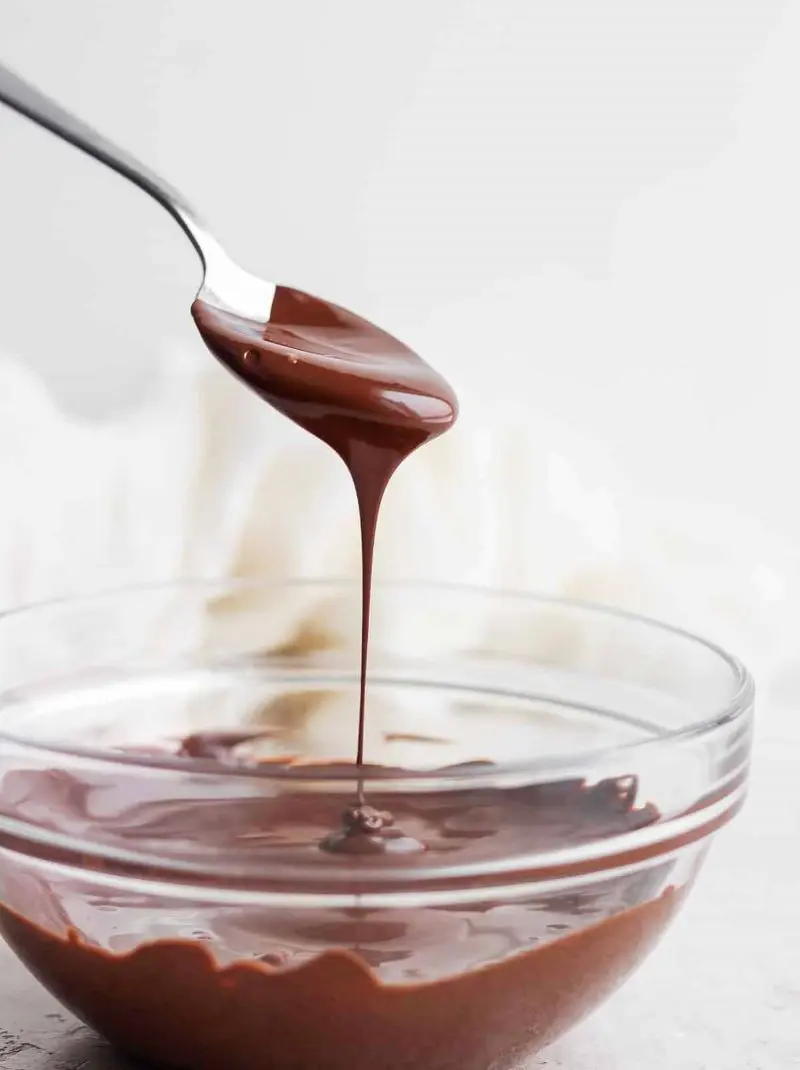
Continue to stir until the chocolate is completely melted and smooth. This may take a few minutes. Be patient and avoid rushing the process. If the chocolate is melting too slowly or if you notice it starting to seize, remove the bowl from the heat and stir until it’s fully melted.
Once the chocolate is fully melted and smooth, carefully remove the bowl from the saucepan. Be cautious of the hot steam and water. If you need the melted chocolate for immediate use, you can start using it right away. If you're not using it immediately, let it cool slightly before handling it.
Overall Takeaways
Melting chocolate on the stove using the double boiler method is quite handy and effective. It’s gentle on the chocolate, preventing burning and ensuring smooth results. The process is generally not messy, as long as you keep the bowl dry and avoid water splashes.
It typically takes about 5 to 10 minutes, depending on the amount and type of chocolate. The risk of scorching is low if you use low to medium heat and stir regularly. Overall, it’s a reliable and easy method for melting chocolate perfectly for various recipes.
3. Melting Chocolate Directly In A Skillet Or Saucepan
Melting chocolate directly is a quick and easy way to achieve a smooth, creamy texture. By using low heat and stirring constantly, you can melt chocolate evenly without any lumps. Here’s a step-by-step guide:
What You'll Need
Skillet or saucepan
Spatula
Heat-resistant bowl (optional, if you want to transfer melted chocolate)
Stove
Instructions
Step 1: Preparation
Take a clean, dry skillet or saucepan. Next, chop the chocolate into small, uniform pieces if you’re using bars. If you’re using chocolate chips, you can use them as they are.
Step 2: Preheat the Pan and Add Chocolate
Place your skillet or saucepan on the stove over low heat. It’s important to use low heat to prevent the chocolate from burning. Add the chocolate pieces or chips directly into the skillet or saucepan.
Using a heat-resistant spatula, stir the chocolate continuously. This helps to distribute the heat evenly and prevents the chocolate from burning or sticking to the bottom of the pan.
Step 3: Monitor the Heat
If you notice the chocolate starting to bubble or if it begins to catch on the sides, immediately remove the pan from the heat. Reduce the heat even further if needed. Chocolate melts best at low temperatures.
Keep stirring until the chocolate is completely melted and smooth. This can take several minutes, so be patient. The melted chocolate should be glossy and fluid. If it seems too thick, you can add a small amount of neutral oil (like vegetable oil) to thin it out.
Stir in a small amount at a time until you reach the desired consistency.
Step 5: Remove from Heat
Once the chocolate is fully melted and smooth, remove the skillet or saucepan from the heat to prevent further cooking. If you need to transfer the chocolate to another container for further use, carefully pour it into a heat-resistant bowl or directly onto your intended surface.
If the chocolate will be used in the skillet or saucepan, make sure to use it promptly before it starts to set.
Allow the skillet or saucepan to cool before cleaning. Chocolate can be stubborn to clean if it hardens, so it’s best to soak it in warm, soapy water before washing.
Overall Takeaways
This direct method for melting chocolate is both effective and quick, typically taking just 2-4 minutes. Using low heat and stirring constantly helps prevent burning. However, it can be a bit messy, as chocolate may stick to the pan. You’ll need to wash the skillet or saucepan and the spatula.
This method is practical when you don’t have a double boiler or microwave available. It’s best for small batches of chocolate and when you want a quick melt without transferring chocolate between containers.
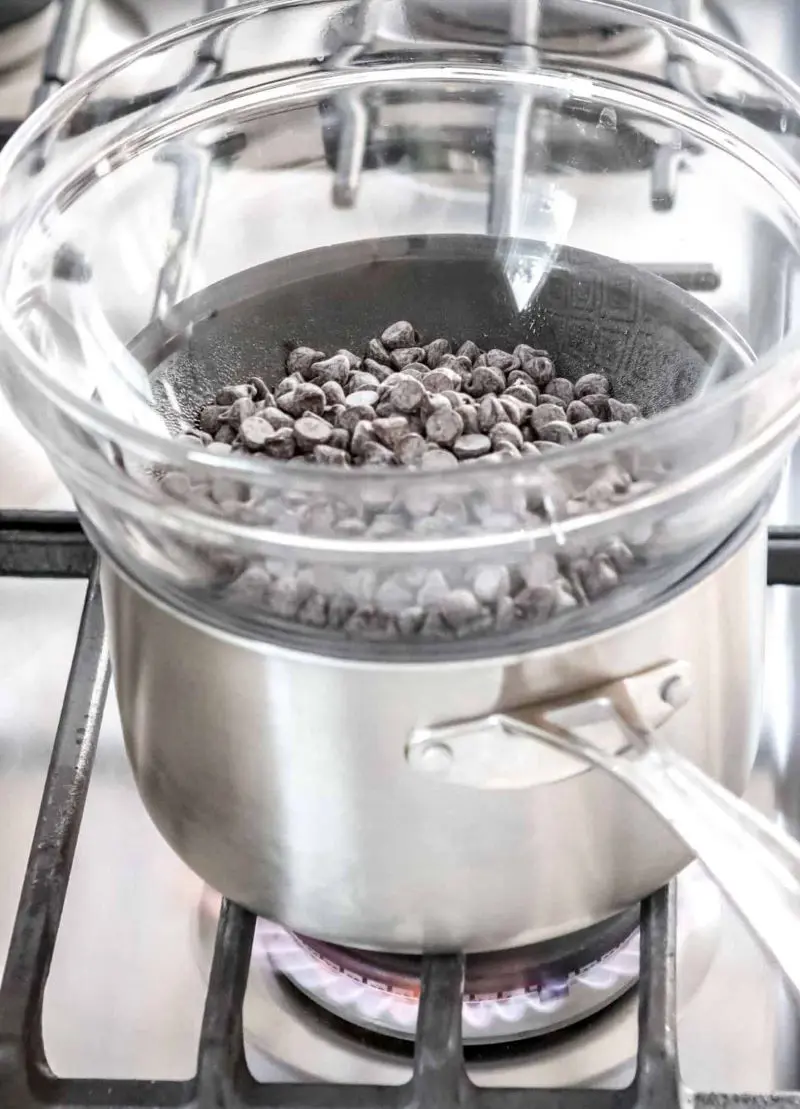
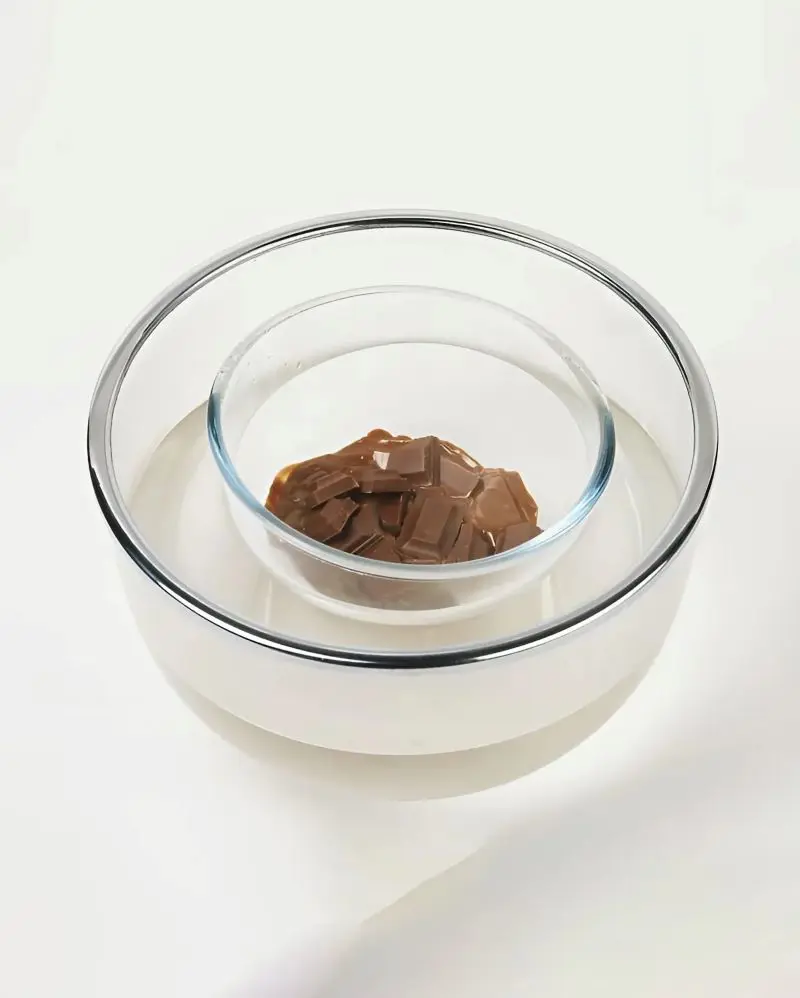
4. Melting Chocolate In A Hot Water Bath
This technique helps prevent scorching and ensures a smooth, glossy finish, perfect for baking or dipping. Here’s how to do it:
What You'll Need
Wide skillet
Heatproof bowl (stainless steel or tempered glass)
Heatproof spatula or spoon
Stove
Oven Mitts or Kitchen Towels
Instructions
Step 1: Prepare the Skillet and Chocolate
Choose a wide skillet and fill it with about one inch of water. Place the skillet on the stove over medium heat. While the water heats up, chop your chocolate into small, uniform pieces. This helps it melt more evenly.
Step 2: Set Up the Heatproof Bowl
Use a heatproof bowl made of stainless steel or tempered glass. Make sure it's large enough to hold the chocolate and fit comfortably in the skillet.
Step 3: Place the Bowl in the Water
Carefully place the bowl with the chopped chocolate directly into the water in the skillet. The bowl should be in the water, but not submerged—just sitting in it. Heat the water until it reaches a simmer. Once it starts simmering, turn off the burner.
Let the bowl of chocolate sit in the hot water, stirring occasionally. The residual heat from the water will gently melt the chocolate. Stir the chocolate frequently to ensure it melts evenly and doesn’t burn.
Once the chocolate is fully melted and smooth, carefully lift the bowl out of the skillet. Be cautious of any residual steam or hot water. Use the melted chocolate immediately or let it cool slightly if needed.
Overall Takeaways
It’s fine if the bowl touches the water or the bottom of the skillet. The old advice about keeping the bowl’s bottom away from the water is outdated. Steam in a double boiler is hotter than water, so a water bath is actually gentler. This method takes about 3 to 4 minutes and is similar to using a double boiler.
It’s a good choice if you don’t have a perfectly fitting bowl and saucepan. Just be careful to keep water from getting into the chocolate.
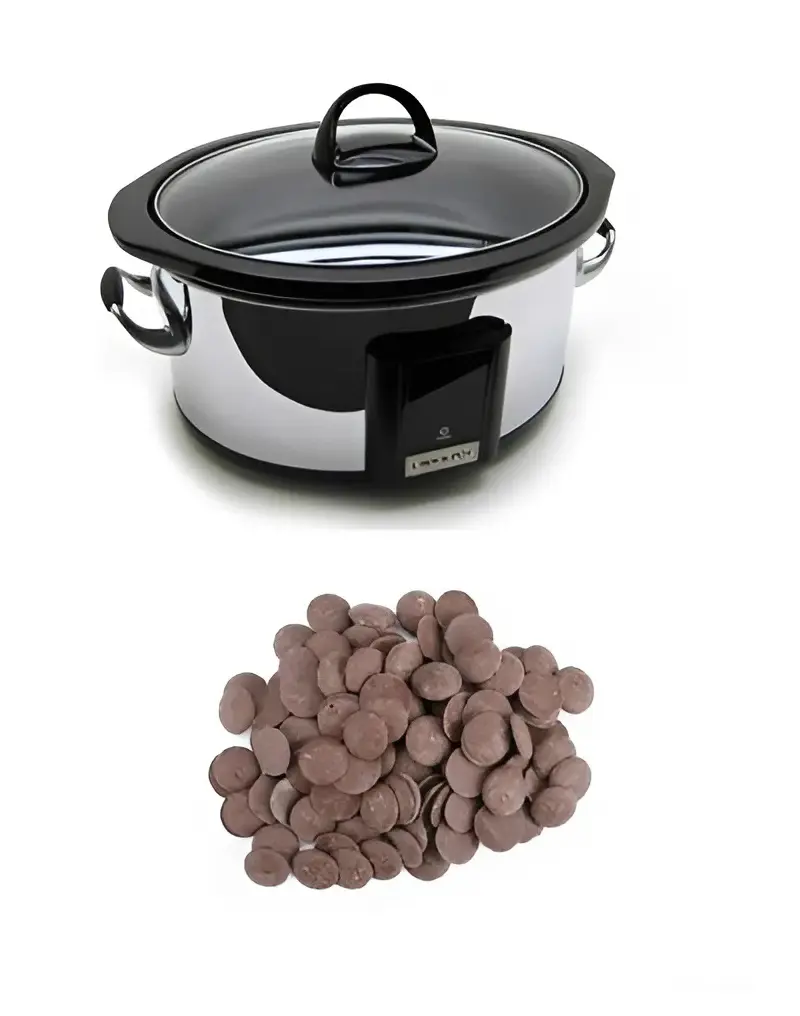
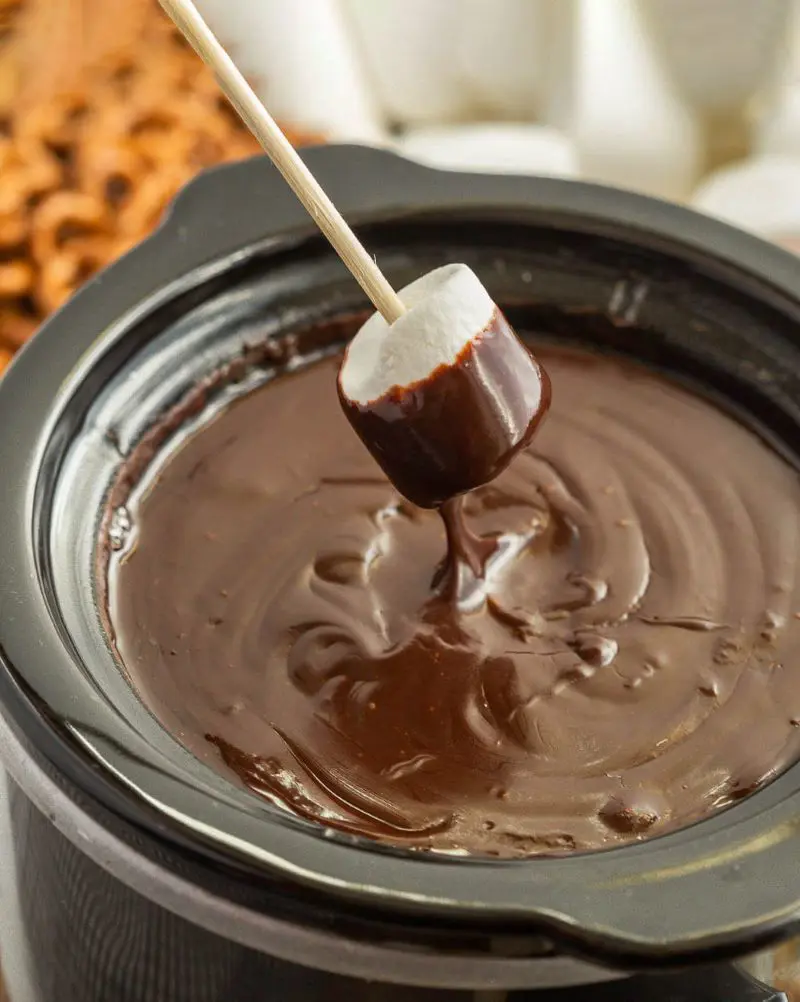
5. Melting Chocolate In A Slow Cooker
A slow cooker set on LOW heat is ideal for melting chocolate. It maintains a consistent, gentle temperature, making it perfect for dipping large batches of pretzels, cookies, strawberries and more.
What You'll Need
Slow Cooker (Crock-Pot)
Heatproof bowl (optional)
Spatula or spoon
Parchment paper or silicone baking mat (optional)
Instructions
Step 1: Preparation
Make sure your slow cooker is clean and dry. Place it on a stable, flat surface. If you’re using a large block of chocolate, chop it into small, uniform pieces. This helps the chocolate melt evenly.
Add the chopped chocolate to the slow cooker. If you’re using chocolate chips, you can add them directly without chopping. Next, turn on your slow cooker and set it to the "Low" setting. This setting is gentle and prevents the chocolate from burning.
Step 3: Stir Occasionally
Let the chocolate melt slowly. Stir it gently every 10-15 minutes with a spatula or spoon to ensure it melts evenly and doesn’t stick to the sides. As the chocolate melts, it will become smooth and creamy. If you notice any lumps, keep stirring until the chocolate is fully melted and smooth.
Once the chocolate is completely melted and smooth, turn off the slow cooker. Keep the lid off to prevent condensation from dripping into the chocolate.
You can now use the melted chocolate for your recipe. If you need to keep it warm for dipping or drizzling, you can leave it in the slow cooker on the "Keep Warm" setting.
Step 5: Clean Up
After you’re done, carefully wash the slow cooker and utensils. Melted chocolate can be sticky, so it might require a bit of extra scrubbing.
Overall Takeaways
Melting chocolate in a slow cooker typically takes about 30-60 minutes on the "Low" setting. This method is excellent for melting large amounts of chocolate or keeping it warm for dipping or drizzling. It’s gentle and reduces the risk of scorching compared to other methods.
Stirring occasionally ensures even melting and a smooth texture. This technique is ideal for preparing chocolate for desserts or candy-making, where precise and controlled heating is important.
Helpful Tips For Melting Chocolate
Here are some simple tips for melting chocolate:
Keep Your Heat Low
When melting chocolate, it's important to keep the heat low. If you use high heat, the chocolate can get too hot and burn, which ruins its smooth texture and makes it hard to fix. Instead, melt it slowly over low heat. This gentle approach allows the chocolate to melt evenly and stay smooth, without risking burning it.
By taking your time and using low heat, you'll get the best results for your melted chocolate.
Avoid Moisture
Water can ruin melted chocolate by causing it to clump up. To avoid this, make sure that everything that comes into contact with the chocolate is completely dry. This includes bowls, spoons, and any fruits you might dip—make sure to pat the fruit dry before dipping.
When stirring, use a rubber or silicone spoon rather than a wooden one, as wooden spoons can hold moisture and cause the chocolate to seize. By keeping everything dry and using the right utensils, you can ensure your melted chocolate stays smooth and perfect.
Should You Temper Your Chocolate Once Melted
When chocolate melts and then cools, it can develop a white, powdery appearance known as "blooming." This happens because cocoa butter crystals have separated from the chocolate and risen to the surface. While bloomed chocolate is still safe to eat, it can look unappealing and have a dull texture.
To prevent blooming, bakers usually temper the chocolate by carefully controlling the temperature during melting and cooling. Tempering helps the chocolate cool to a smooth, glossy finish and ensures it sets properly.
Recipes Using Melted Chocolate
Chocolate Fondue
Chocolate fondue is a fun and delicious way to enjoy melted chocolate. You dip fruits, marshmallows, or pieces of cake into the warm chocolate, which makes for a sweet and creamy treat. It's great for sharing with loved ones or for a party.
This treat is as simple as it is tasty. Fresh strawberries are dipped in melted chocolate and then left to cool. The juicy, sweet strawberries with the smooth chocolate coating make for a delightful snack. You can even add extra touches like a drizzle of white chocolate or some crushed nuts.
Chocolate Ganache Tart
A chocolate ganache tart features a rich, smooth chocolate filling in a buttery tart crust. The chocolate filling is made by mixing melted chocolate with cream, creating a creamy and glossy dessert. It's often topped with a bit of cocoa powder or fresh berries for added flair.
Chocolate bark is a crunchy, customizable treat. You spread melted chocolate on a baking sheet, sprinkle it with nuts, dried fruits, or candy pieces, and let it cool. Once hardened, you break it into pieces for a delicious snack or a gift.
Author
Editor
Rojina Pokhrel
Rojina Pokhrel is a food enthusiast and writer who believes that every meal tells a story. With a deep love for traditional flavors and a curiosity for new tastes, she explores how food connects people, places, and memories. Her writing blends personal reflections with cultural insights, capturing the soul of recipes and the warmth of shared meals.
Whether she's documenting heirloom dishes or uncovering hidden culinary gems, Rojina brings heart, heritage, and a sense of wonder to every piece she writes.