Growing your own sprouts at home is easier than you might think! While you can find broccoli, alfalfa, and bean sprouts in stores, making them yourself is a fun project, especially during sunny seasons.
Sprouts are a nutritious addition to sandwiches, wraps, and salads. You don't need a green thumb or fancy equipment to grow them. With just a few simple tools you probably already have in your kitchen, you can enjoy fresh, homegrown sprouts whenever you want. In this guide, we'll show you how to sprout seeds easily at home.
What Are Sprouts?
Sprouts are the very first stage of a plant's growth, occurring just as the seed begins to open. This happens before any true leaves appear. When a seed starts to grow, it develops in two directions at once:
Downward Growth:
This part is called the radicle.
It's the plant's first root.
Its job is to search for nutrition and water.
Upward Growth:
This part is called the plumule.
It's the plant's first shoot.
It grows towards light and air.
If you were to provide sprouts with soil and light, they would continue growing into microgreens and then small plants. However, when we grow beans sprout for eating, we stop this process early.
The interesting thing about sprouts is that you don't need soil or light to grow them at home. This makes bean seed sprouting an easy and accessible way to grow fresh, nutritious food in your kitchen.
Tools and Equipment Needed
Growing your own sprouts at home is simple, but these special sprout-growing devices make the process even easier and more convenient. Here's a list of essential supplies, most of which you may already have at home:
1. Non-Draining Container
A non-draining container is a crucial component of your sprouting setup. This vessel should be able to hold water without leaking, serving as a catch basin for the water that drains from your sprouts. You likely have suitable options already in your kitchen.
A glass jar, a large bowl or tray, or a Pyrex dish all work well for this purpose. The size of the container will depend on how many sprouts you plan to grow, but generally, something around the size of a dinner plate or larger is ideal.
This container not only prevents mess by catching excess water but also allows you to reuse the drained water for subsequent rinses if desired, making the sprouting process more water-efficient.
The draining container is where your seeds will actually sprout. It needs to have small holes or a mesh bottom to allow water to pass through while keeping the seeds in place. A common kitchen strainer works well for this purpose, but you can also use specialized sprouting trays.
The key feature to look for is a large surface area, which allows you to spread your seeds out after each rinse. This spreading is crucial as it helps prevent issues with mold and mildew by ensuring good air circulation around the sprouting of seeds. The draining container should fit comfortably inside your non-draining container, creating a simple but effective sprouting system.
3. Water Source
Water is the catalyst that triggers seed germination and supports the growth of your sprouts. For most home sprouting setups, simple room-temperature tap water is perfectly adequate. You can use water directly from your kitchen faucet or keep a pitcher of fresh water nearby for convenience.
The temperature of the water is important - it should be cool to lukewarm, as water that's too hot can damage the seeds. Some enthusiasts prefer to use filtered or spring water, especially if their tap water is heavily chlorinated, but this isn't strictly necessary for successful sprouting.
4. Seeds
Choosing the right seeds is crucial for successful and safe sprouting. It's important to note that not all seeds sold for gardening are suitable for sprouting and eating. Look for seeds specifically labeled for sprouting, as these are tested for safety and are free from harmful bacteria.
Non-GMO seeds from reputable growers are preferred by many sprouting enthusiasts. Buying in bulk, such as in 1-pound bags, is more cost-effective than purchasing small packets of garden seeds. Popular choices for sprouting include alfalfa, broccoli, radish, and mung bean seeds, each offering different flavors and nutritional profiles.
5. Optional Specialized Equipment
While you can start growing beans sprouts with basic kitchen items, there are specialized tools available that can make the process more convenient and efficient. Sprouting jars with built-in mesh lids and drip trays are popular for their ease of use.
Sprouting towers allow you to grow multiple batches of different sprouts simultaneously, which is great if you enjoy variety. Some people prefer stainless steel sprouting systems for their durability and sleek appearance.
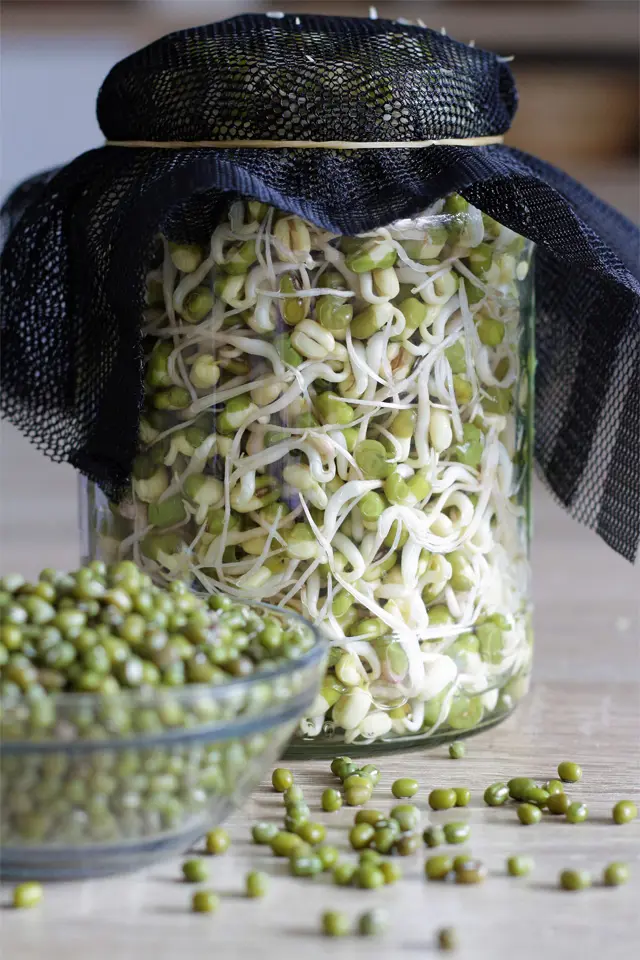
How to Grow a Bean Sprout
Bean for sprouting is a simple way to grow nutrient-rich food right in your kitchen. With just a few basic tools and some seeds, you can produce fresh, living sprouts in less than a week.
This process requires minimal space and effort, making it perfect for anyone looking to add fresh, homegrown nutrition to their diet. Here's how to grow beans sprouts:
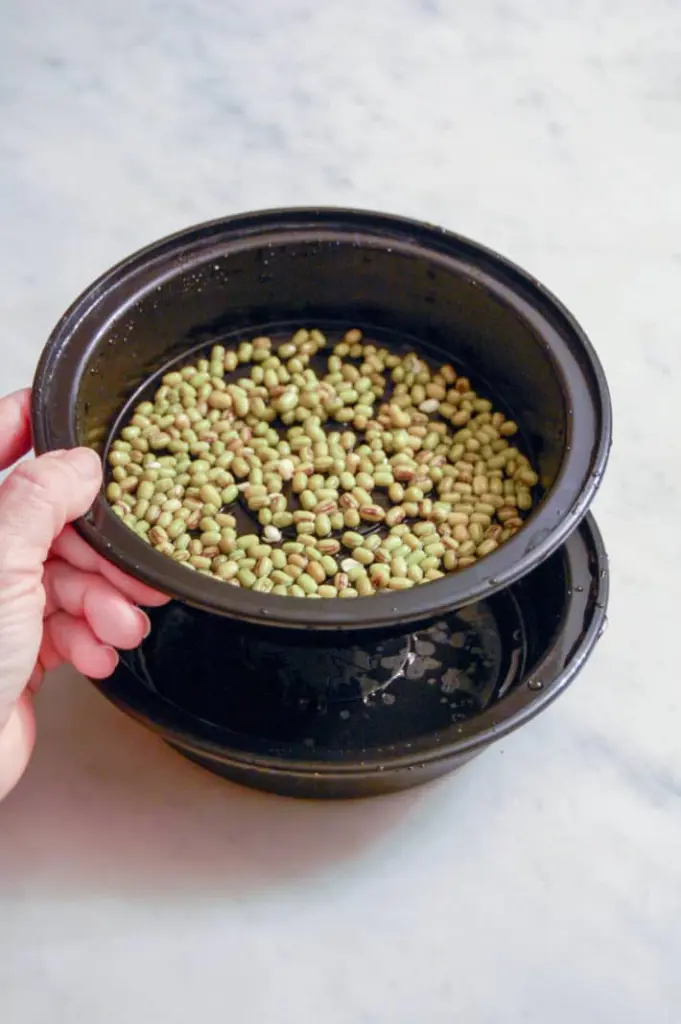
To begin growing your own sprouts beans, start by soaking a tablespoon of seeds overnight. Place the seeds in a non-draining container and add just enough water to submerge them all, though some may float on the surface. Cover the container with a cheesecloth, napkin, or washcloth and let it sit overnight. This initial soaking helps to kickstart the germination process.
Step-2: Drain the Seeds
The next morning, drain the soaked seeds through a strainer or draining container. Spread the seeds evenly across the bottom of the container, ensuring they don't overlap to prevent mildew. This step can easily become part of your morning routine – perhaps while you enjoy your coffee or tea. The key is to create a habit that makes sprouting a seamless part of your day.
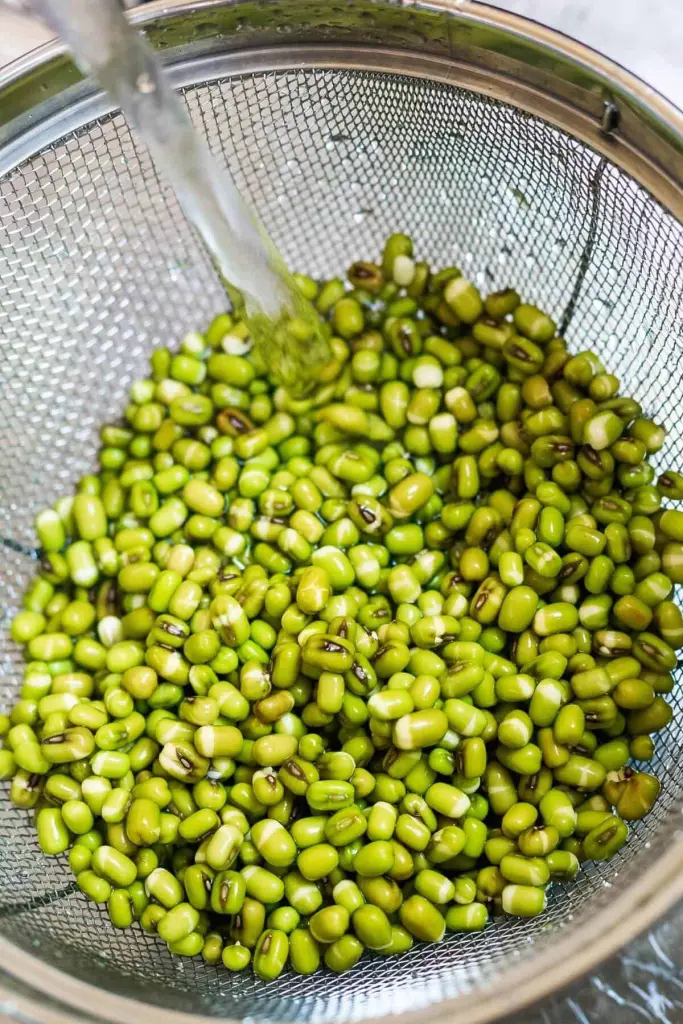
Throughout the day, rinse your seeds whenever you're at the kitchen sink. Follow these steps each time:
Run water over the seeds in the strainer
Spread them out again evenly
Cover them and let them sit
Keeping the seeds near the sink serves as a helpful reminder. Before bed, give your seeds a final rinse, spread them out evenly, and cover them for the night. This regular rinsing keeps the seeds moist and clean, promoting healthy growth.
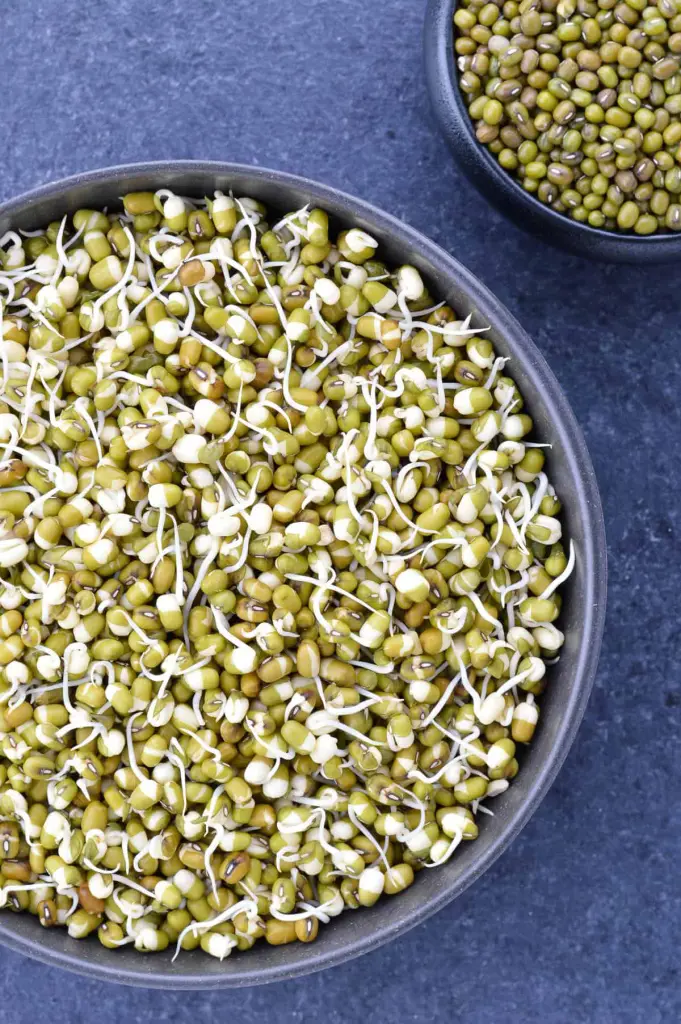
For the next five to seven days, continue rinsing and draining your seeds at least twice daily. This simple routine of rinsing and spreading out the seeds is all that's required – no soil, special lighting, or fertilizer needed. Within three to four days, you'll notice the seeds beginning to swell, followed by the appearance of tiny white tails – the first roots of your sprouts.
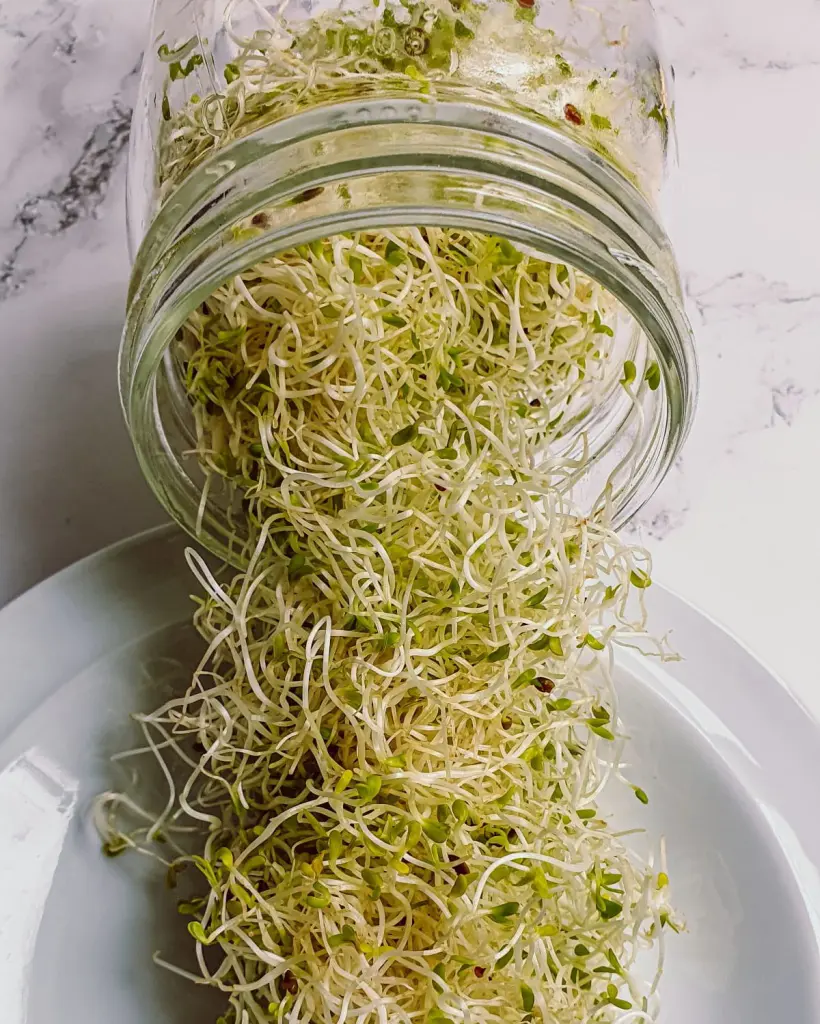
How to Harvest Your Sprouts
Harvesting your homegrown sprouts is a simple process that marks the exciting conclusion of your sprouting journey. Here's what you need to know:
1. Timing Your Harvest
Knowing when to harvest your sprouts is crucial for optimal flavor and nutrition. Your sprouts will typically be ready to harvest in about five to six days after starting the sprouting process. The key indicator that it's harvest time is the appearance of the first tiny sets of leaves, also known as cotyledons or seed leaves.
Keep a close eye on your sprouts as they grow, and aim to harvest them within one or two days of seeing these first green leaves emerge. This timing ensures that you're catching the sprouts at their peak of freshness and nutritional value.
2. The Harvesting Process
Harvesting sprouts is straightforward and requires no special tools. Simply remove the sprouts from their growing container or tray. If desired, you can rinse the sprouts to remove any remaining seed coats. This step can improve the texture and appearance of your sprouts.
After rinsing, gently pat the sprouts dry with a clean towel or use a salad spinner to remove excess moisture. This helps keep your sprouts crisp and prevents them from becoming soggy.
3. Storage and Preservation
If you're not planning to use all your sprouts immediately, proper storage is important to maintain their freshness. Store the excess sprouts in the refrigerator, preferably in a container that allows for some air circulation.
This could be a plastic bag with small holes or a container with a loose-fitting lid. Properly stored sprouts can last for several days in the fridge, allowing you to enjoy your harvest over time.
Have you ever considered growing your own sprouts? It's a rewarding and surprisingly easy way to add fresh, nutrient-packed food to your diet. Here are four compelling reasons why everyone should try growing bean sprout bean at home:
1. Sprouts Grow Very Quickly
Sprouts are nature's fast food. Unlike traditional gardening, where you might wait weeks or months for harvest, sprouts deliver results in just days. This rapid growth occurs because we're catching the plants at their very first stage of development.
There's no need to wait for strong roots, flowers, or fruit to form. Within 3-7 days, depending on the variety, you'll have a batch of crisp, fresh sprouts ready to enjoy. This quick turnaround makes sprouting an ideal project for those who want immediate gratification from their gardening efforts.
2. Sprouts Don't Require Much Space
Gone are the days when you needed a large backyard to grow your own food. Sprouts are the ultimate space-savers in the world of home gardening. You can grow enough sprouts to add to your daily salads and sandwiches in an area as small as a dinner plate.
Many people keep their sprout containers right on the kitchen counter or near the sink. This makes sprouting an excellent option for apartment dwellers, those with limited outdoor space, or anyone looking to start a low-commitment gardening project.
3. Sprouts Are Super Nutritious
When it comes to nutrition, sprouts pack a powerful punch. When you eat a sprout, you're consuming the initial nutrition of the seed - all those vitamins and minerals that would have eventually spread out to dozens of leaves, stems, and pieces of fruit are concentrated in that tiny sprout.
The exact nutrient profile varies depending on the type of sprout, but generally, they're rich in vitamins, minerals, and antioxidants. Some sprouts, like broccoli sprouts, are even known for their potential health-promoting properties.
4. Sprouts Can Be Grown Year-Round
One of the most appealing aspects of growing sprouts is that you can do it any time of the year, regardless of the weather outside. Unlike outdoor gardening, which is subject to seasons and climate, sprouting is done indoors in a controlled environment.
This means you can enjoy garden-fresh flavor even in the depths of winter or in areas where outdoor gardening is challenging. Whether you live in a cold climate, a hot desert, or a small urban apartment, you can produce fresh, homegrown sprouts every week of the year.
Recipes with Sprouts
Sprouts are not just a garnish – they're nutritional powerhouses that can elevate any meal. These young, tender shoots of germinated seeds are packed with vitamins, minerals, and enzymes.
Whether you're a health enthusiast or simply looking to add more variety to your diet, incorporating sprouts into your meals can be both delicious and beneficial. Here are some exciting sprouting beans recipes to help you make the most of these tiny nutritional giants:
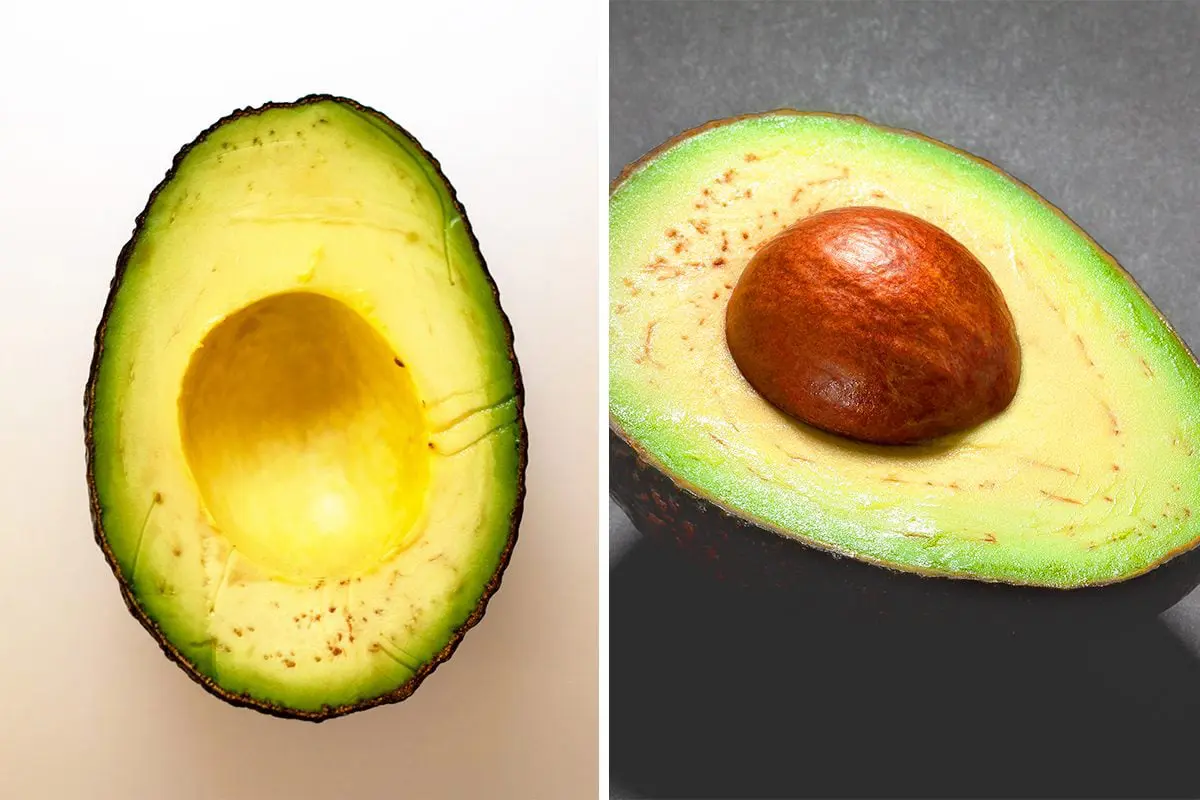
BLATs (Bacon-Lettuce-Avocado-Tomato Sandwiches)
This healthy twist on the classic BLT adds creamy avocado and nutrient-rich broccoli sprouts. The avocado spread, flavored with garlic and basil, provides a delicious base. The broccoli sprouts add a peppery crunch and boost of vitamins.
Rainbow Veggie Wraps
These colorful wraps are perfect for kids and adults alike. Inspired by sushi, they're filled with a variety of vegetables, cheese, and hummus, then rolled and sliced. Sprouts add texture and nutrients. Pair with store-bought green goddess dressing for an easy and flavorful meal.
Loaded Garden Pizz'alad
This unique dish combines the best of pizza and salad. A crispy provolone cheese pizza serves as the base for a fresh garden salad loaded with lettuce, bell pepper, and avocado. Sprouts can be added for extra crunch. The homemade tangy ranch dressing ties it all together. Use bread flour for an extra crispy crust.
West Coast Avocado Toast
For a quick and nourishing vegan lunch, try this California-inspired toast. Sprouted whole-wheat bread forms the base, topped with protein-rich hummus, creamy avocado, and your choice of sprouts. For an interesting twist, experiment with red clover sprouts for their mild, sweet flavor.
Ham, Egg & Sprouts Breakfast Sandwich
Elevate your breakfast with this quick yet sophisticated open-faced sandwich. The key is tossing the sprouts in a zesty mustard-lemon juice mixture, ensuring each bite is full of bright, peppy flavor. This simple step transforms a basic sandwich into a cafe-worthy meal in just five minutes.
Author
Editor
Naveen Maharjan
Naveen Maharjan is the Head Chef at Porterhouse Hospitality Group, bringing years of culinary expertise and a passion for fine dining. With a diverse background in renowned establishments, Naveen has previously served as Chef de Partie and Commis Chef at Hyatt Regency Kathmandu, and as a Pizza Maker/Cook at Fire And Ice Pizzeria in Kathmandu. Additionally, Naveen has honed skills at the Radisson Hotel, where he worked in various culinary capacities.
A graduate of Silver Mountain School of Hotel Management, where he studied Culinary Arts and Hospitality Management, and SMSH:DICA, Naveen has built a strong foundation in the culinary arts, which continues to shape his creative approach to cooking.
Now based in Tamworth, New South Wales, Naveen combines his rich experiences with a commitment to delivering high-quality dishes, making him a respected figure in the hospitality industry.