Freezing green beans fresh may be among the best long-term ways of saving both the fresh taste from the garden and the nutrients for months to come. This simple process allows you to enjoy the summer feeling even during the coldest of winter days.
Another advantage is that green beans also freeze well since they maintain their texture. For those wondering how to freeze green beans, this procedure is simple and no plenty of tools are required. Freeze your over-produce or farmers' market windfalls, and you can have a go-to ingredient for many recipes all year.
Although raw green beans can be frozen, this is not recommended. Most of the time, this leads to an unsatisfactory result: mushy in texture, lifeless appearance and lacks flavor. When freezing green beans, blanching is preferred.
Blanching is quite simple and consists of a two-step process:
Briefly boil the green beans
Quickly cool them in ice water
This method maintains the beans' bright color, crisp texture and fresh flavor even after freezing.
The science behind blanching:
The ice bath is important. It stops the action of enzymes that will continue to degrade the quality of the beans if such action is not controlled, resulting in a loss of flavor, color, or even texture.
Other advantages associated with blanching include:
Cleaning the beans by removing dirt and other impurities
Retaining vitamins and minerals that are essential
How To Choose Green Beans For Freezing
Right green beans are very important to ensure that you get the best freezing results. Here is what to look for:
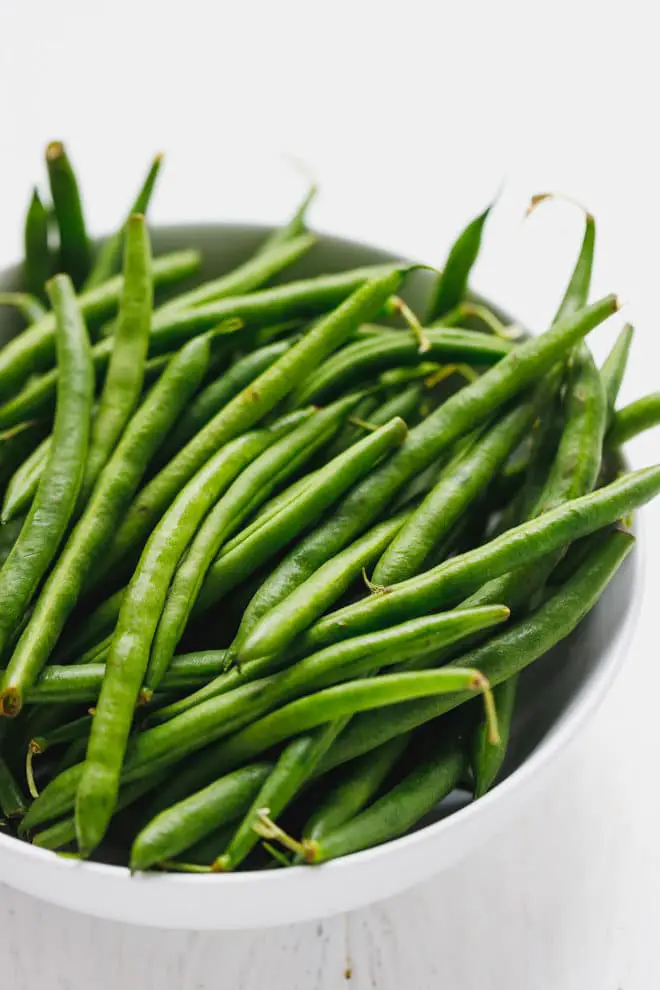
Freshness: Always start with the freshest green beans available.
Seasonality: While green beans are available throughout the year in most supermarkets, they are usually at their best May to October.
Appearance: Choose beans that are completely green, without blemishes, and firm—not limp, shriveled, or lumpy.
Storage and Longevity:
Fresh green beans: When kept in the refrigerator, they are best used within three to five days.
Frozen green beans: According to FoodSafety.gov, they generally remain fresh and of decent quality if frozen properly for up to eight months.
Why Freeze Green Beans?
If you can't use fresh green beans immediately, freezing is a great way to handle the fresh beans. It will give you the chance to retain their quality and enjoy it during another time of the year when the peak growing period will be long over.
Freeze your green beans the same day they are purchased or harvested for the best freshness. Sort out your beans before freezing and set aside ones that are decaying or damaged. Note that blanching before freezing will ensure that you preserve them in color, texture, and flavor.
How To Freeze Fresh String Beans
Gather These Essential Items
A sturdy cutting board
A sharp knife
A large pot
Water
Ice
A large bowl
A baking sheet
Paper towels
A freezer-safe container
Step-by-Step Instructions
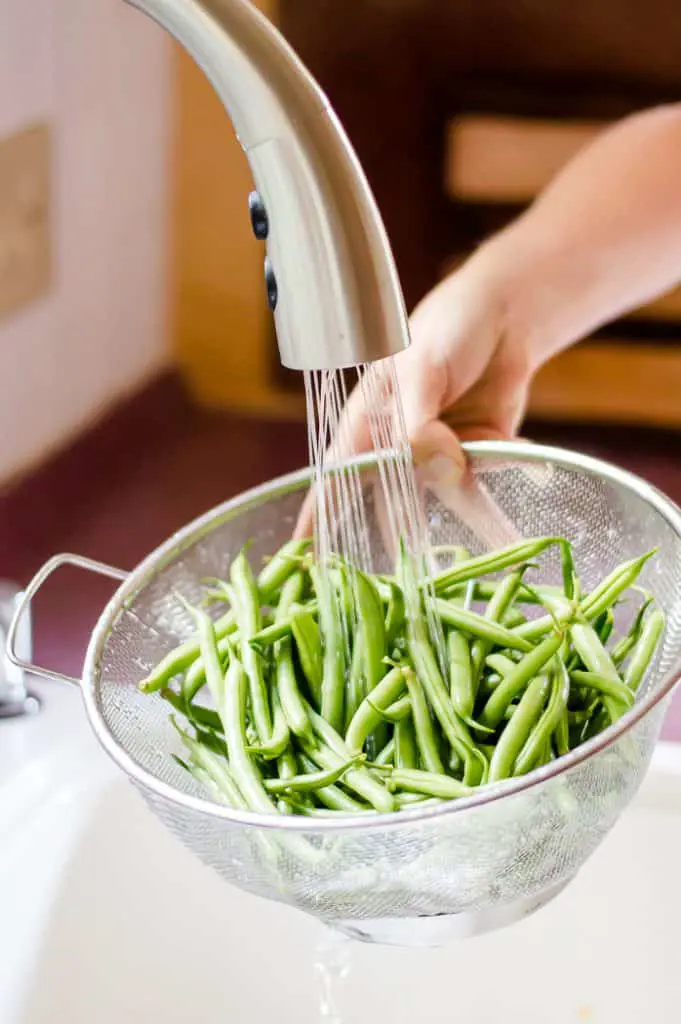
1. Wash the green beans
Rinse the green beans under cool, running water, then generally wash off any signs of dirt, removing them for clean freezing.
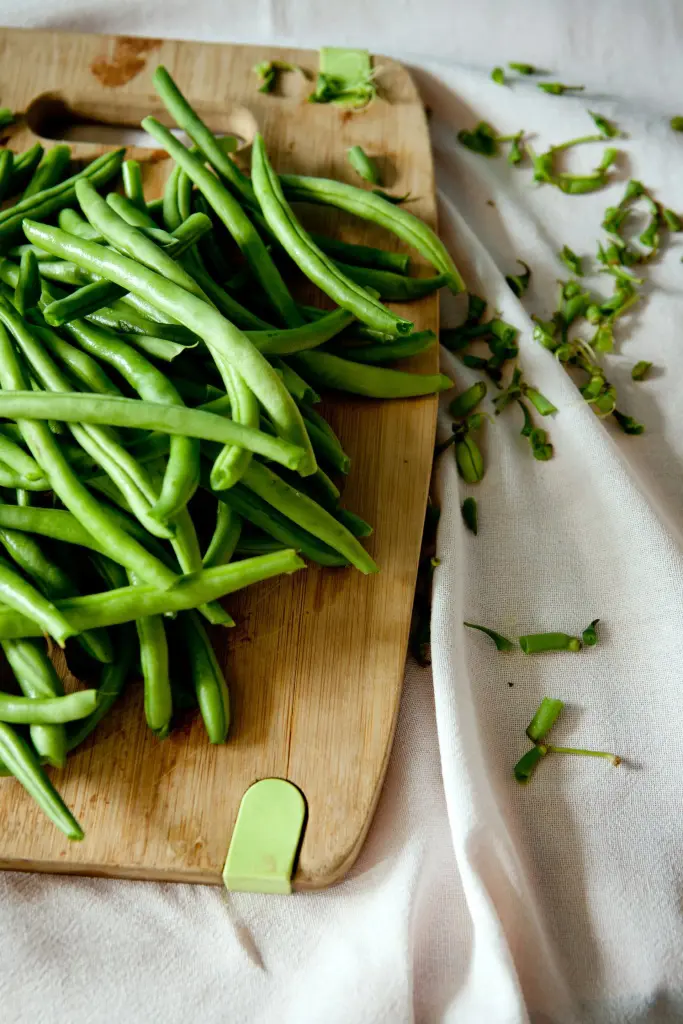
Use the sharp knife on your cutting board to snip off the ends of the green beans. Trim both ends from all the beans to remove the unwanted portions and make them look pretty.
You can cut your beans into pieces of uniform length but leave them whole for a more decorative appearance. Cutting the beans by no means is a necessity, it just will allow you to store and use later in an easier manner.
You can either cut the beans in halves, or if you so desire, you can even go ahead and cut them into 2-inch sections.
4. Blanch your green beans
Blanching is a very key step in order to keep the color and crunchiness the beans are so famous for. Here is how you go about it:
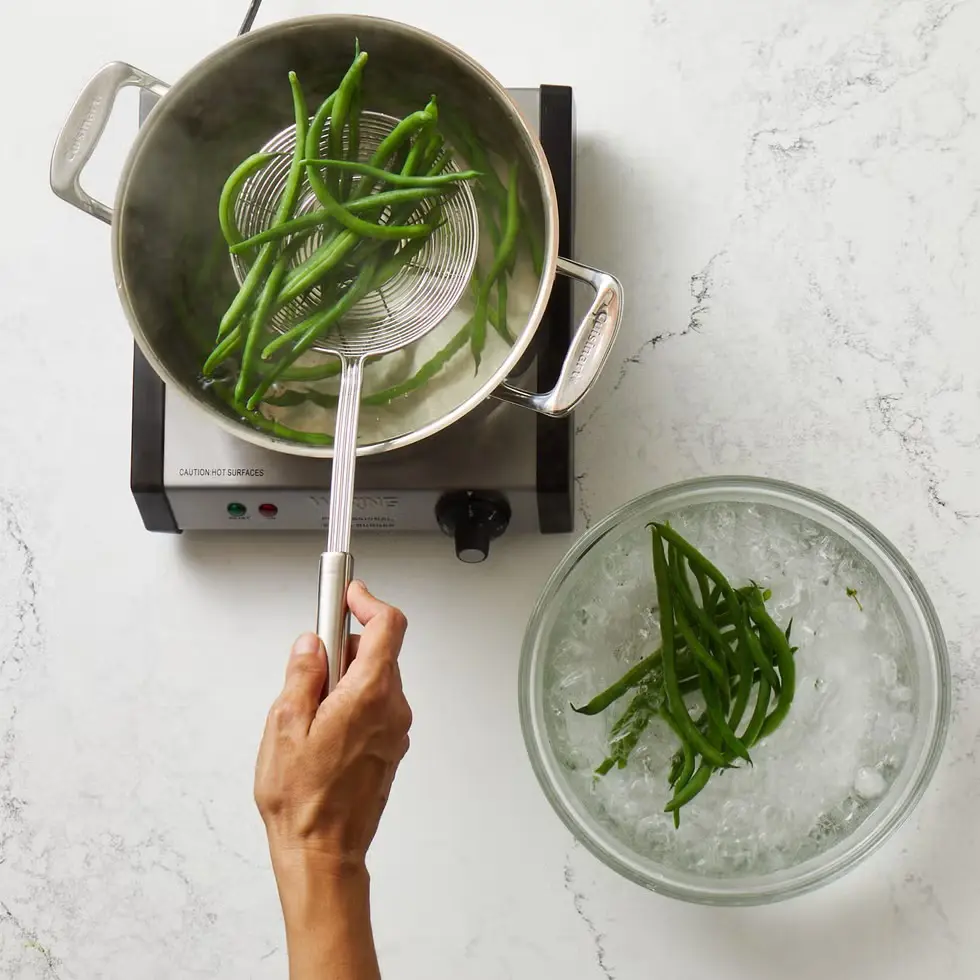
Take a large pot of water and let it come to a rolling boil.
Throw your beans into boiling water, and let them cook for no longer than 3 minutes.
Place your trimmed and cut green beans in the boiling water and let it boil for 3 minutes. Parboiling simply means pre-cooking vegetables to a point of tenderness without it getting "mushy."
Drain the green beans, reserving blanching and have ready your ice bath by placing the water inside a large bowl and add cubes of water.
Drain the beans by the use of a pair of tongs or a slotted spoon, and transfer them immediately into a dish with ice water. This would halt the process of cooking.
Let the beans cool completely in the ice water for 5 mins.
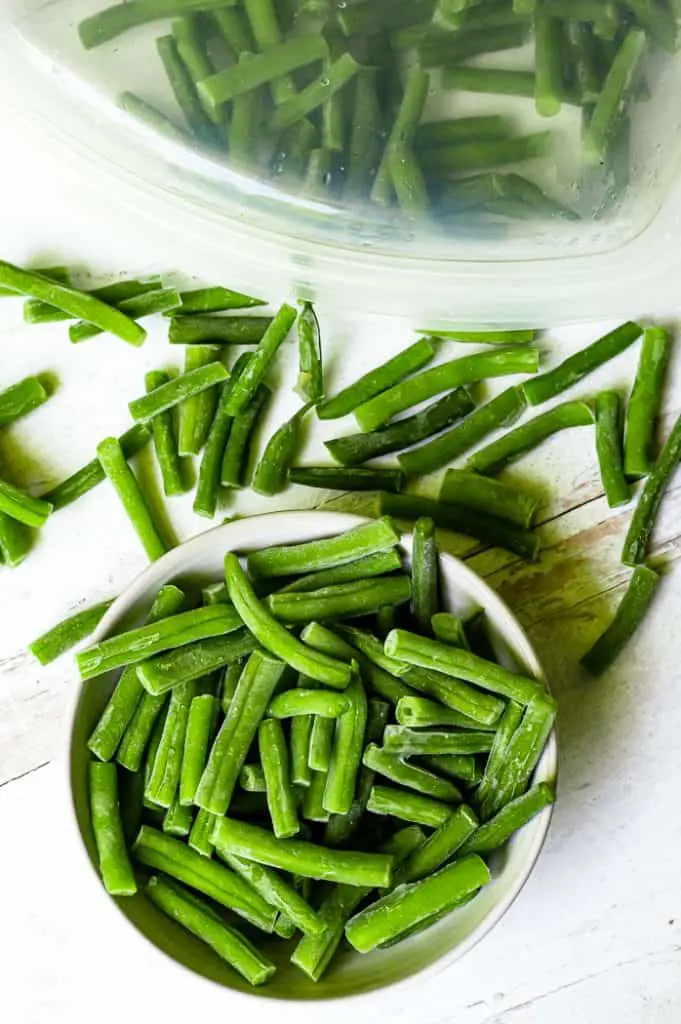
Remove beans from ice water by either using a slotted spoon or pouring them into a strainer. Spread out beans on a baking sheet and gently pat them dry with paper towels or a clean kitchen towel.
6. Flash Freeze
Put the baking sheet with the beans in the freezer for 4-6 hours so that the beans get frozen separately and will not stick together in a clump, allowing you to portion it further.
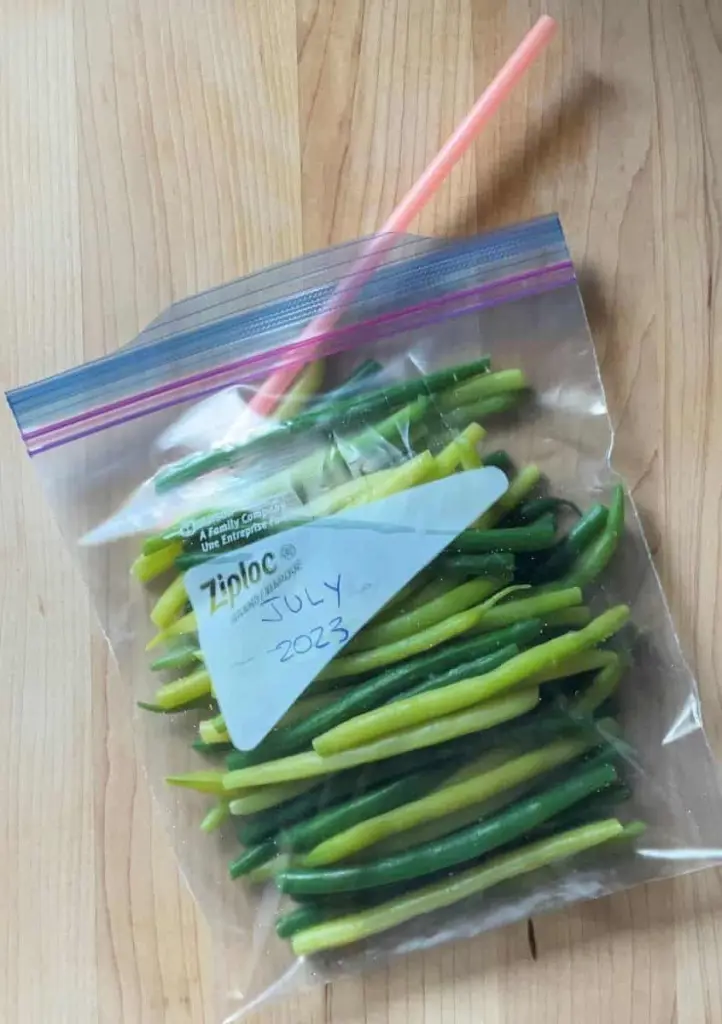
7. Freezing in bulk for a longer time
Once the beans are frozen transfer them from a baking sheet to a large silicone bag or another airtight, freezer-safe container. Another great container for this is a large silicone bag, but you can also use any sealable, freezer-safe bag or container.
Yes, you can freeze green beans after they are cooked. Blanching is a type of light cooking that works well with freezing, but fully cooked green bean dishes, like casseroles, will also freeze. However, note that the fully cooked green beans will be softer and watery in nature when thawed and reheated.
Freeze cooked green bean dishes in resealable freezer bags with as much air pushed out of the bags as possible or place in airtight containers that are freeze-worthy. Portioning helps so that freezing smaller portions is easier to thaw and reheat later on.
Containers should always be marked with the name of the dish and a freezing date. To use, simply thaw in the refrigerator overnight and reheat thoroughly.
For best quality, use frozen cooked green bean dishes within 2 to 3 months for best flavor and texture, although they generally will be safe to eat for longer. This way, you can save leftovers, cut food loss, and even have ready-made meals on busy days.
Additional Tips For Freezing String Beans
1. Start with fresh beans:
Use the freshest green beans possible. This will ensure the best flavor and texture after freezing. Fresh beans should be crisp, bright green, and blemish-free.
2. Blanch before freezing:
Blanching is essential in maintaining the quality of your green beans. Blanching is brief immersion in boiling water, followed by rapid cooling in ice water. Blanching helps retain color, texture, and nutrients. How to blanch green beans to freeze:
Boil beans for 2-3 minutes
Immediately transfer into the ice bath
Cool for an equally long period of time as the boiling process
3. Dry thoroughly:
Before you finally package your green beans, make sure that your green beans are dry after the blanching and cooling process. The excess moisture will lead to freezer burn. Use clean kitchen towels to pat dry them, or just use a salad spinner.
4. Proper Packaging:
Use freezer-safe bags or containers
Remove air as much as possible because this is the reason for freezer burn.
Measure out the beans so that you can easily use them later
5. Labeling:
Always label your packages with:
Contents ("Green Beans")
Date of freezing
Quantity or weight (optional)
This helps in keeping track and makes sure that you use the oldest beans first.
6. Use within time recommended:
For best quality, use your frozen green beans in 6 to 8 months. While they are safe to eat beyond that, the quality is diminished.
7. Methods to freeze:
Tray freeze: Blanch and dry beans, then freeze them on a tray before packaging individually to freeze apart for use in portions.
Flash freeze: Freeze tiny portions in bags apart for easy meal prep.
8. Thawing and using:
You can cook frozen green beans directly from frozen
Fresh green beans can be safely stashed in the freezer for a whopping 10 to 12 months, great for such a long-time preservation plan. And while they remain safe to eat this whole time, quality may slowly diminish.
Newbies to freezing green beans should mark a date or two on the calendar during the year to check and taste them. This will be a great learning curve for you to know how the flavor and texture of the beans change over an extended freezer period.
While proper freezing methods including blanching and airtight packaging keep away freezer burn and generally maintain quality, it is the literal watching of beans that gives personal understanding of their optimal storage time.
You will thus learn when the beans are most high-quality and when and how long you like to store them to better analyze their flavor and texture in your dishes.
How To Thaw Frozen Green Beans
Normally green beans do not require defrosting from their frozen state. This is what makes freezing green beans such a useful food preservation—the beans thaw out quickly and can be used from the freezer in a lot of soups, stews, casseroles, and stir-fries, for example.
However, if a recipe is very picky about the use of thawed green beans, or you just prefer them thawed, you could try one of the following methods:
1. Refrigerator method
It helps preserve the texture of the beans and requires preplanning. Let the frozen beans sit overnight in your refrigerator.
2. Cold water method
Put the frozen beans in a colander.
Run cool water over them slowly until they've thawed.
It is quicker than defrosting in a refrigerator and retains beans' quality.
3. Microwave Quick-Thaw Method
Remove beans from packaging or transfer to a microwave-safe container.
Microwave at 5-second intervals and stir after each interval.
Push down along sides to accelerate thawing.
Stop when the beans are still partially cool and heat will finish thawing in about 5 minutes. Do not cook the beans in the microwave during this process.
Frozen green beans are so versatile—there are a million delicious options that you can add to any of your meals. Here are some popular ways to incorporate them into your cooking:
1. Green Bean Casserole: This dish is quite traditional for everyday meals but can be served during festive table or any other special occasion. It is really smooth – the kind of creaminess that goes well with the crunch of the green beans.
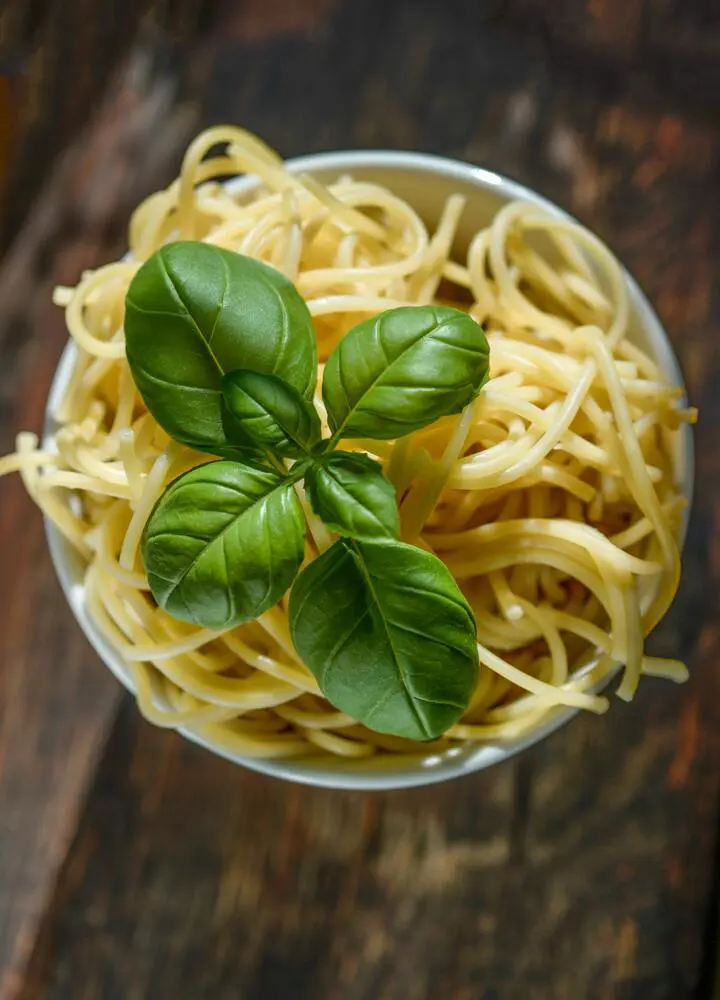
2. Pasta Salad: To bring a new taste in your pasta salad try to use frozen and chopped green beans after thawing. These should be sliced into 1-inch pieces after they have thawed; however, they should not be cooked with the pasta in order to retain their texture.
3. Spice-Roasted Vegetable Medley: Mix frozen green beans with cauliflower and any spice of your desire to come up with a palatable and baked side dish.
4. Sheet Pan Gnocchi: Use them to throw on a sheet pan with gnocchi and other vegetables for a quick, crunchy one-tray dinner.
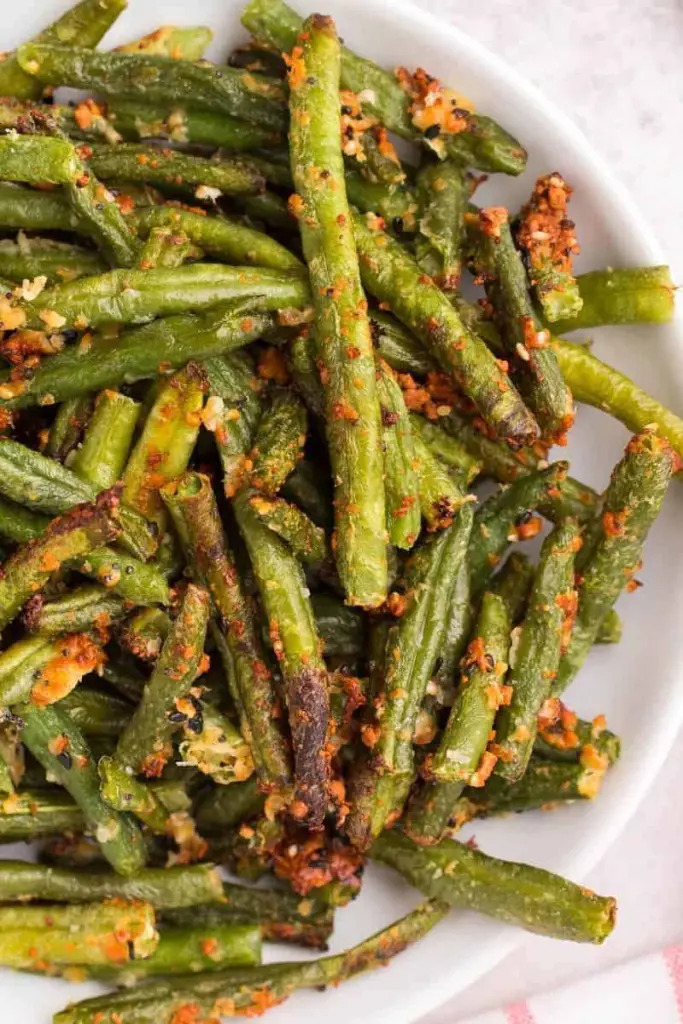
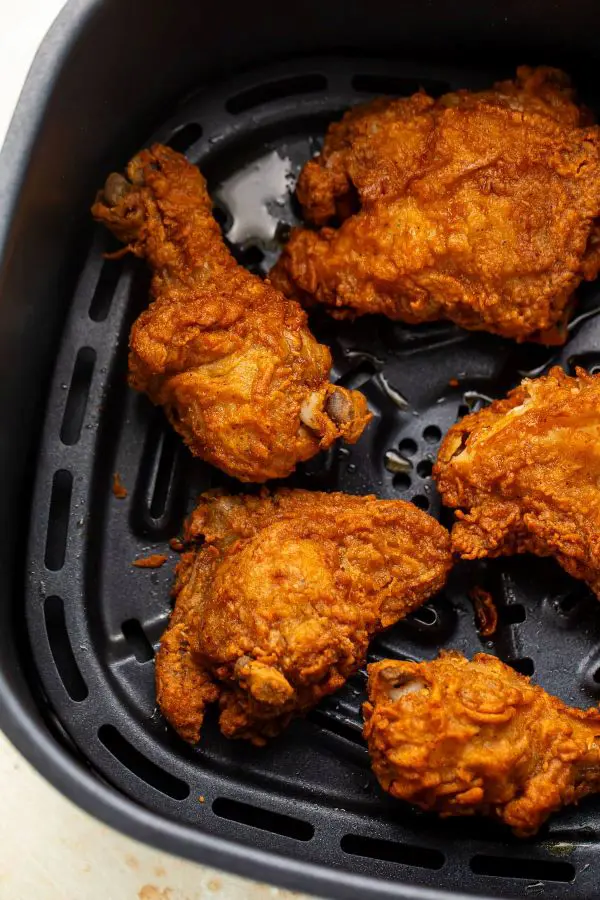
5. Air Fryer Green Beans: For a twice a day fix, just season this with tarragon and air fry the beans as a side dish. Use from frozen state, increase the cooking time slightly depending on the item in question.
6. Soups and Stews: You can use frozen green beans as a substitution in your soup or stew recipes to add on the nutrition value and texture.
7. Stir-Fries: Throw them into Asian style stir fry dishes for colour and texture boost.
8. Sautéed Side Dish: All you need is to fry it with garlic and olive oil to have an easy yummy vegetable dish.
9. Grilled Vegetable Medley: Put them in a foil pack together with other vegetables for that grill taste.
10. Cold Salads: The beans should be thawed and chopped and it can be used in grain salads, green salads among others to increase the fiber content.
Author
Editor
Uttam Thapaliya
Uttam Thapaliya is an accomplished Sous Chef at Hilton Hotel Kathmandu, bringing extensive culinary expertise from his diverse experience in prestigious international hotels. Prior to his current role, Uttam served as Sous Chef at Hyatt Centric Soalteemode Kathmandu and held the position of Junior Sous Chef at Jumeirah Emirates Towers. His earlier career also includes working as Chef de Partie at Jumeirah at Saadiyat Island Resort, where he honed his skills and contributed to world-class dining experiences.
With a passion for culinary excellence and a strong foundation in high-end hospitality, Uttam continues to make a significant impact in the culinary world. His dedication to the craft and attention to detail have made him a respected leader in the kitchen.